📸 Capturing a Scan
📌 Overview
The primary purpose of the Wound³ mobile application is to enable you to consistently capture high-quality scans. In this document, you'll learn how to capture a scan within the mobile application and upload it to the Wound³ database.
🛠️ How do I use the app to capture a scan?
Capturing a scan is as easy as taking a picture with the phone camera, with the added benefit of automatically linking to a patient profile and ensuring quality checks are met.
ℹ️ Note: Because of our data validation criteria, you may be required to take a scan multiple times before a scan is accepted. To learn more about our data validation criteria, click here.
🎥 Watch the Tutorials
🛜❌ Capturing a Scan with Low Internet & Manual Masking
🛜✅ Capturing a Scan with Reliable Internet & AI Masking
➕ Creating the Patient's First Wound Profile
To capture a wound scan, you will first need to create a wound profile. You can learn how add a wound profile to a patient here.
📸 Capturing the Scan
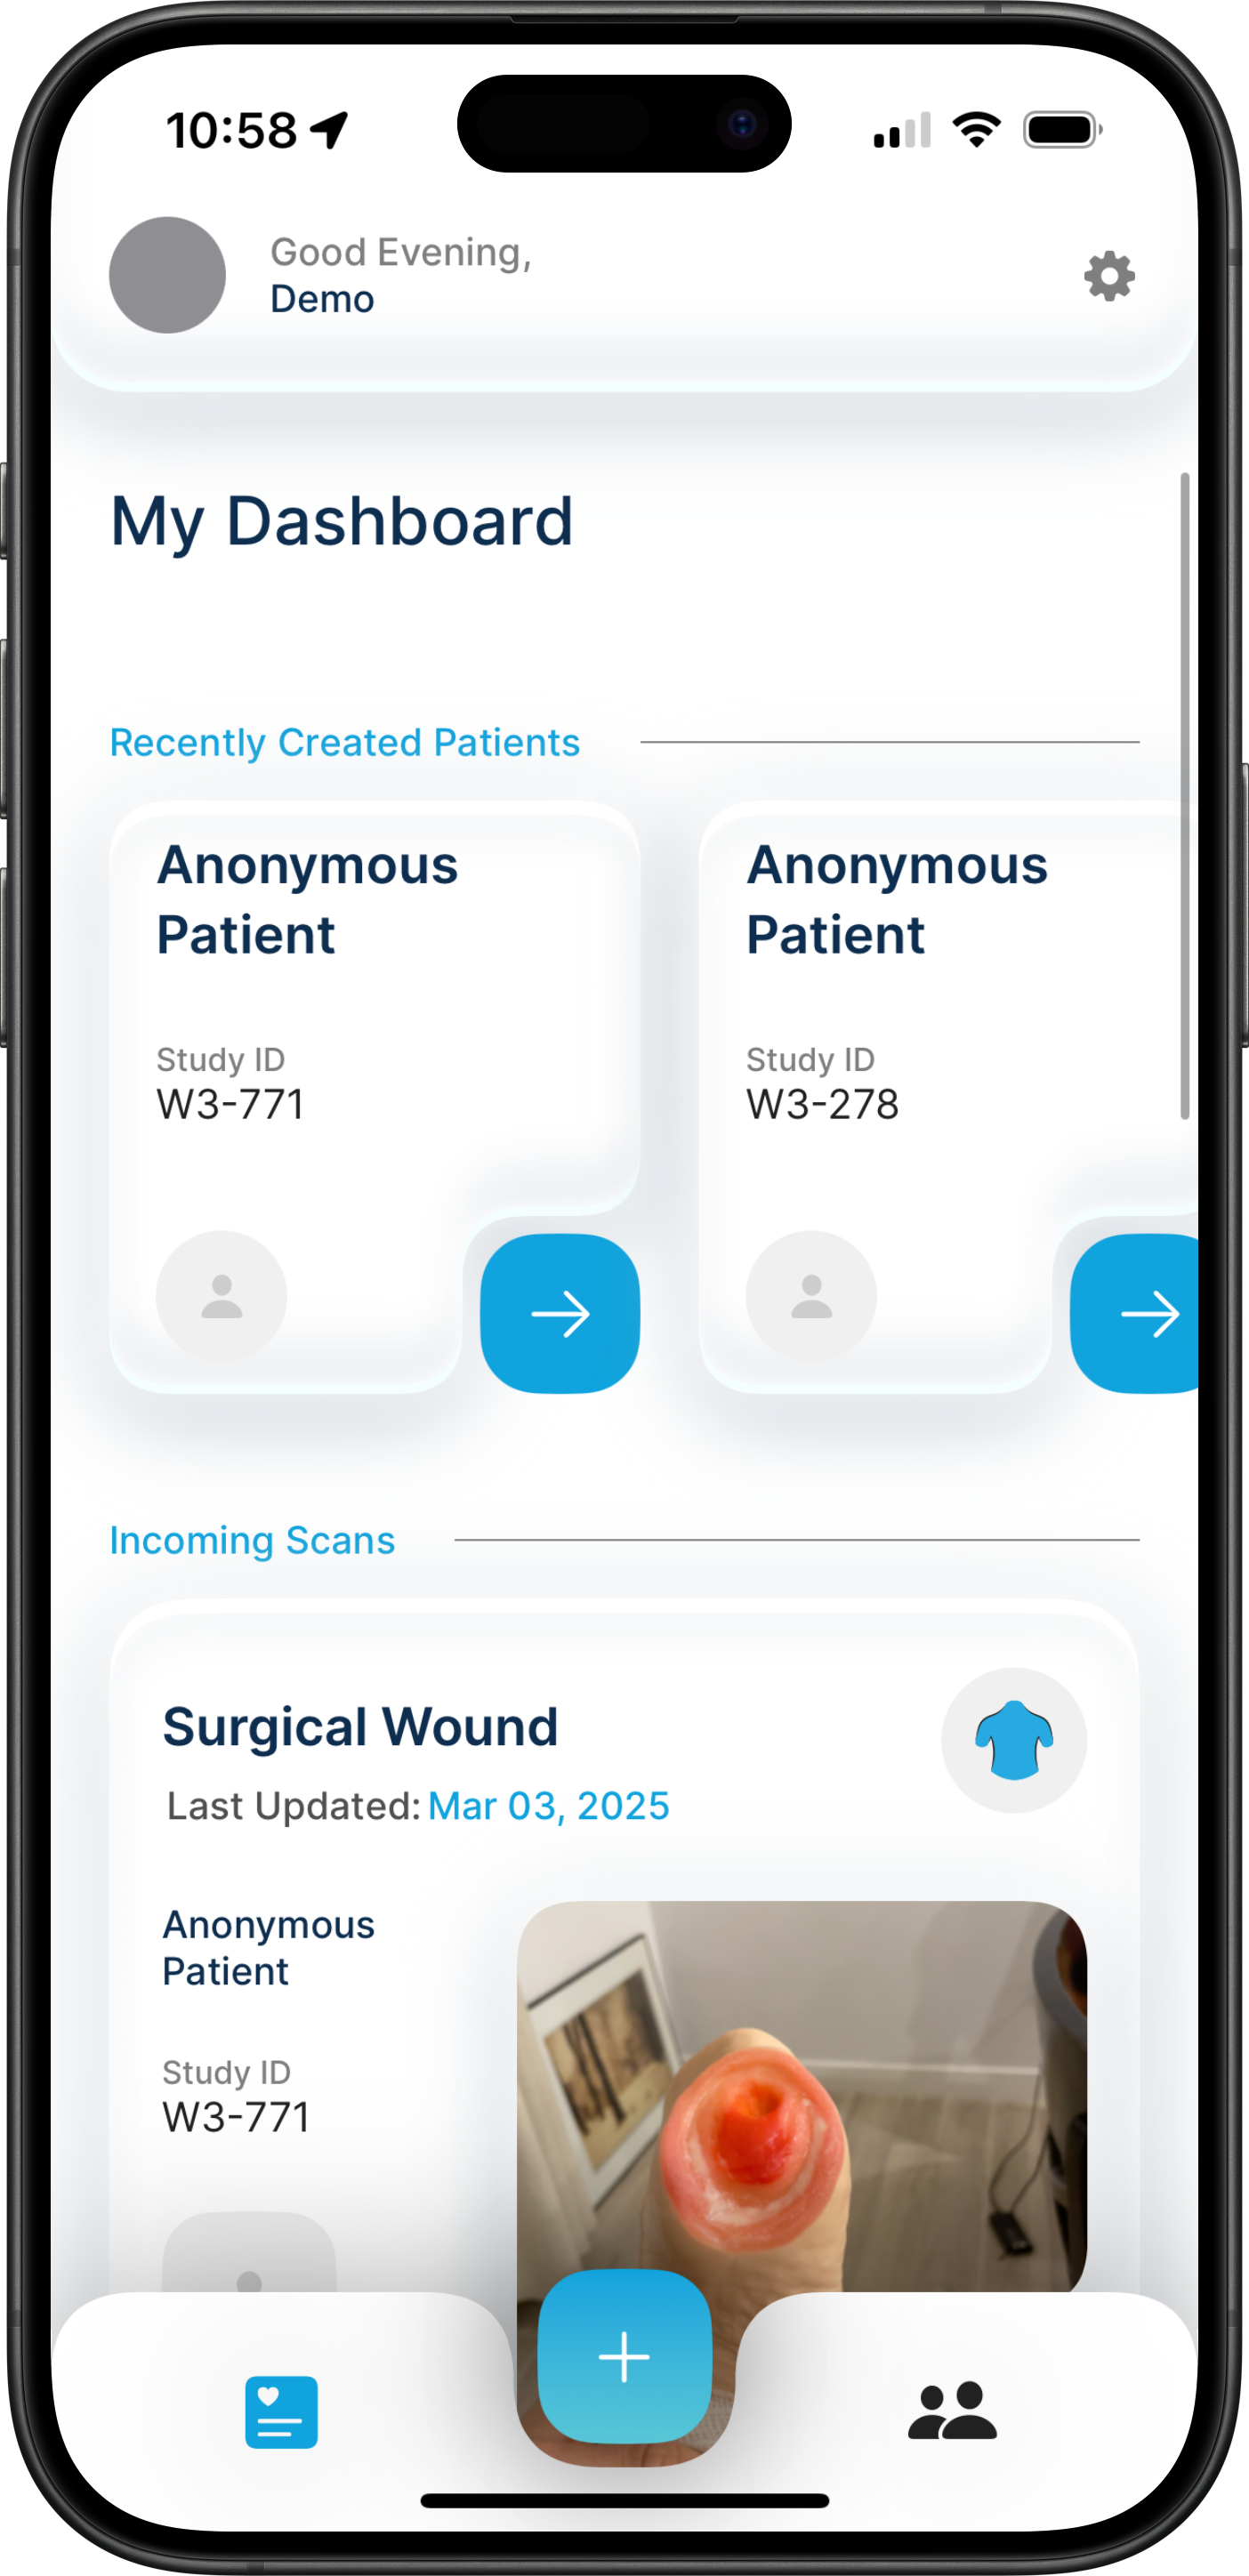
To capture a scan:
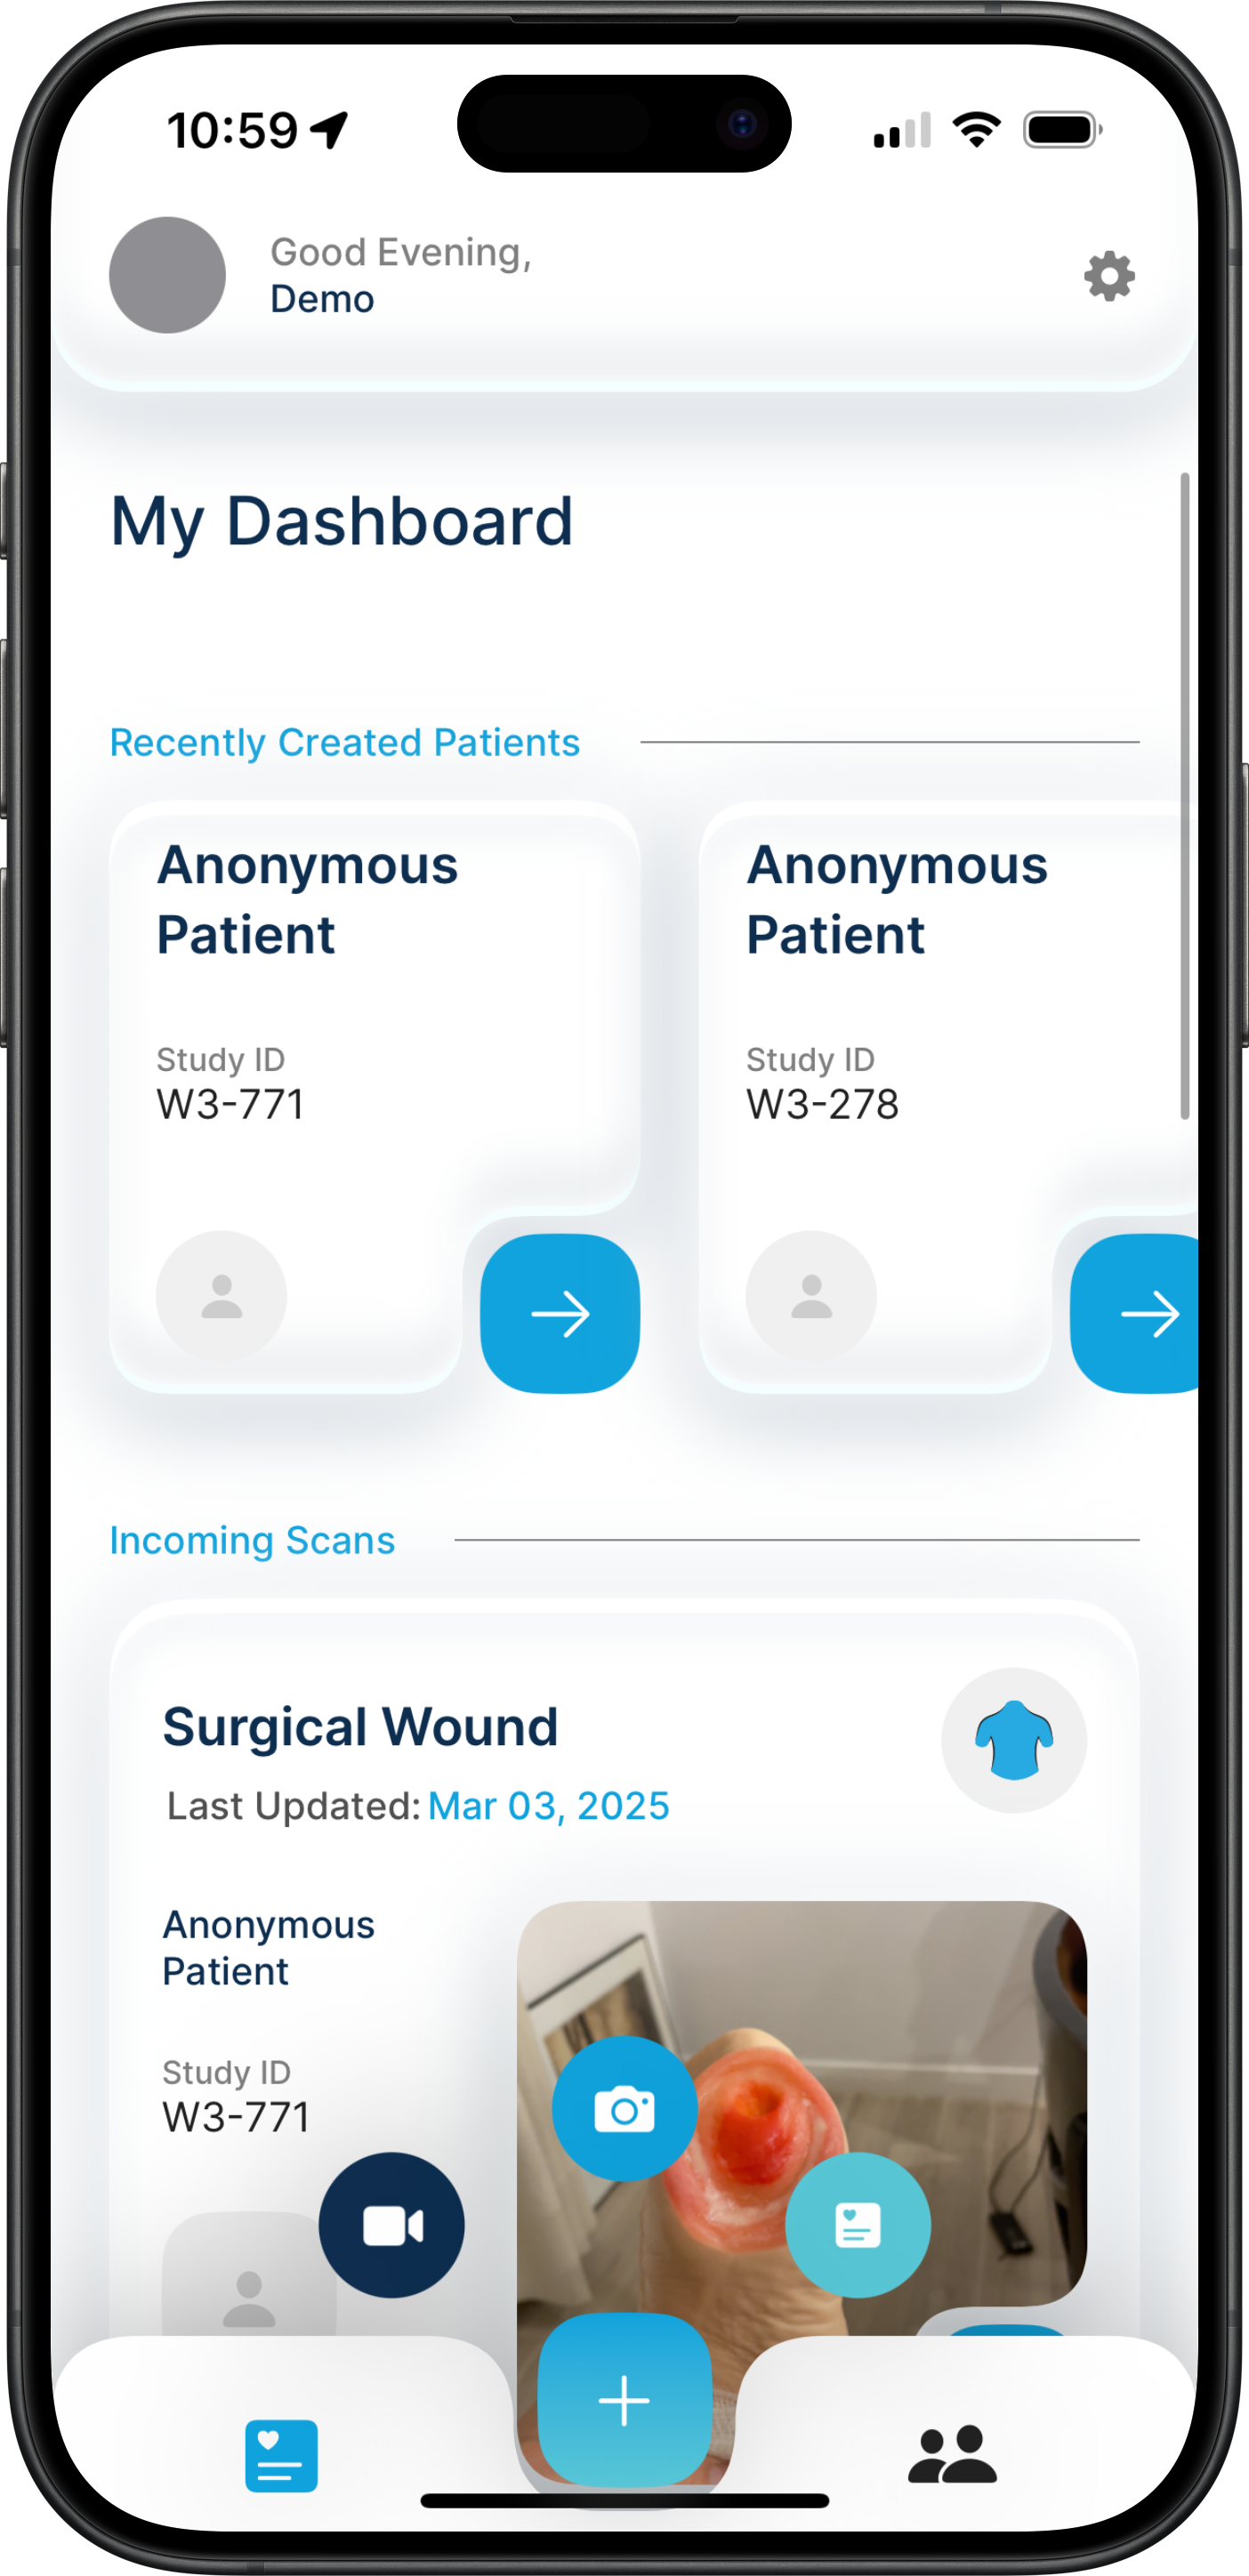
- Select the
blue plus iconat the bottom of the home screen. - Select the
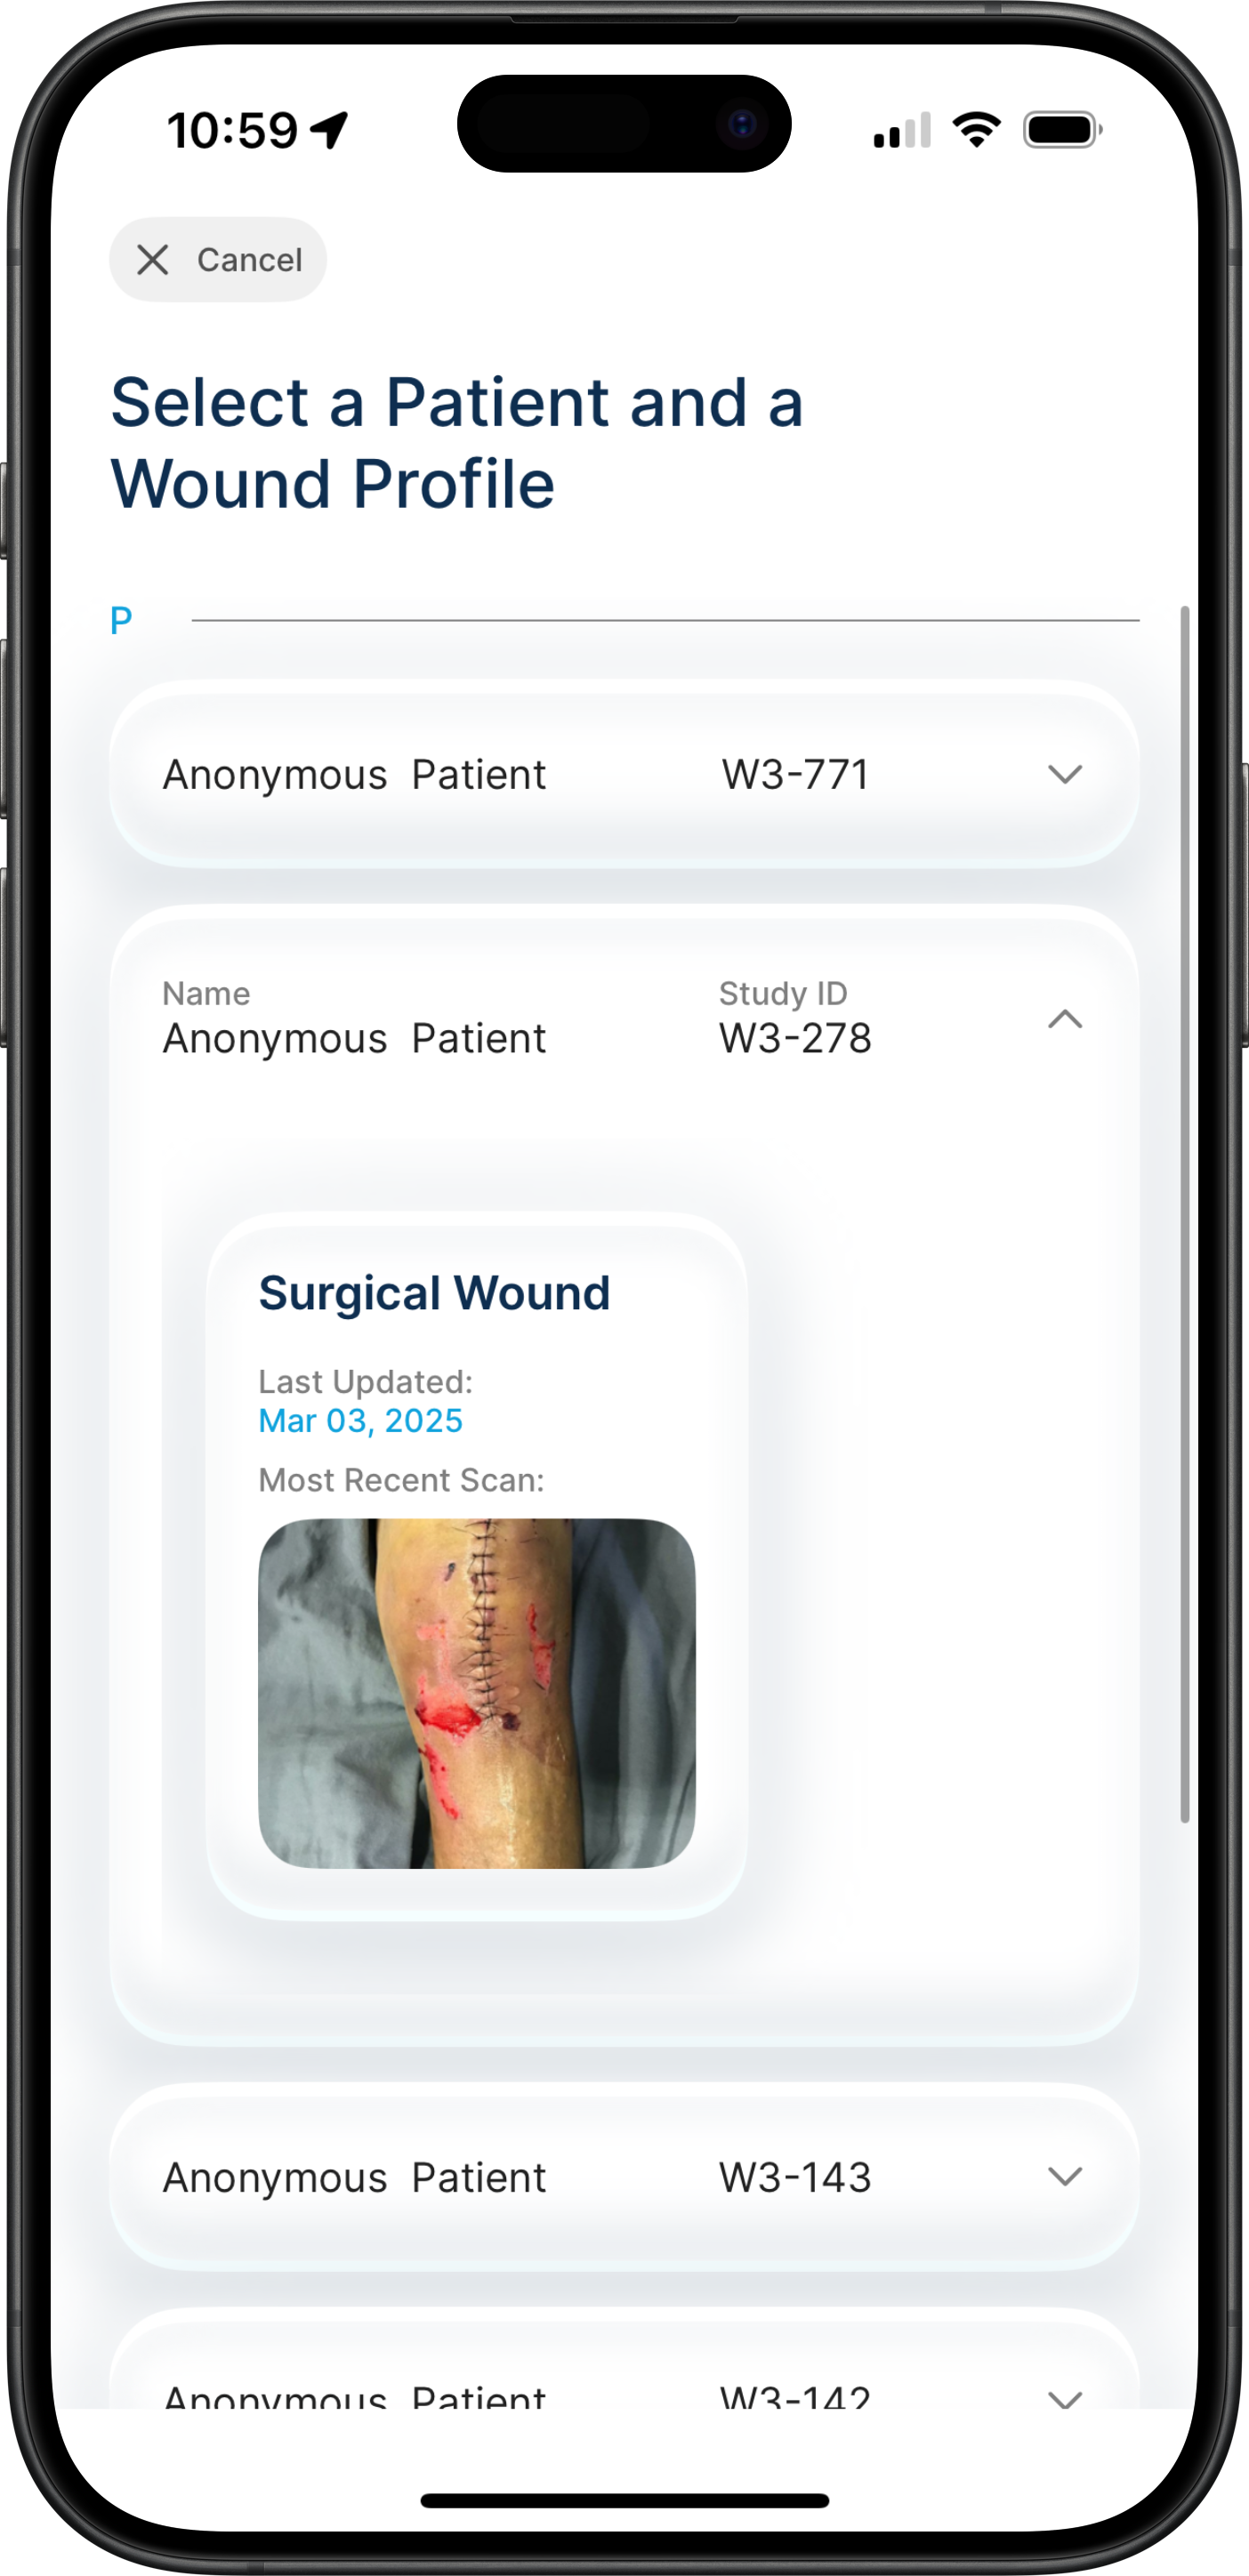
blue camera icon(center, camera icon) from the icons that pop up. - Select the patient you are scanning.
- Select the wound profile you are scanning.
🚨 If a pop-up message appears asking for permission to use the camera, select
Allow.
ℹ️ Note: If you accidentally select
Don't Allowwhen the camera useage permissions appear, you will need to grant the application camera permissions directly within your device's settings. To do so, open the iOS settings application, navigate to Apps, and select the Wound³ Application. From there, you may enable the app to use your device's camera.
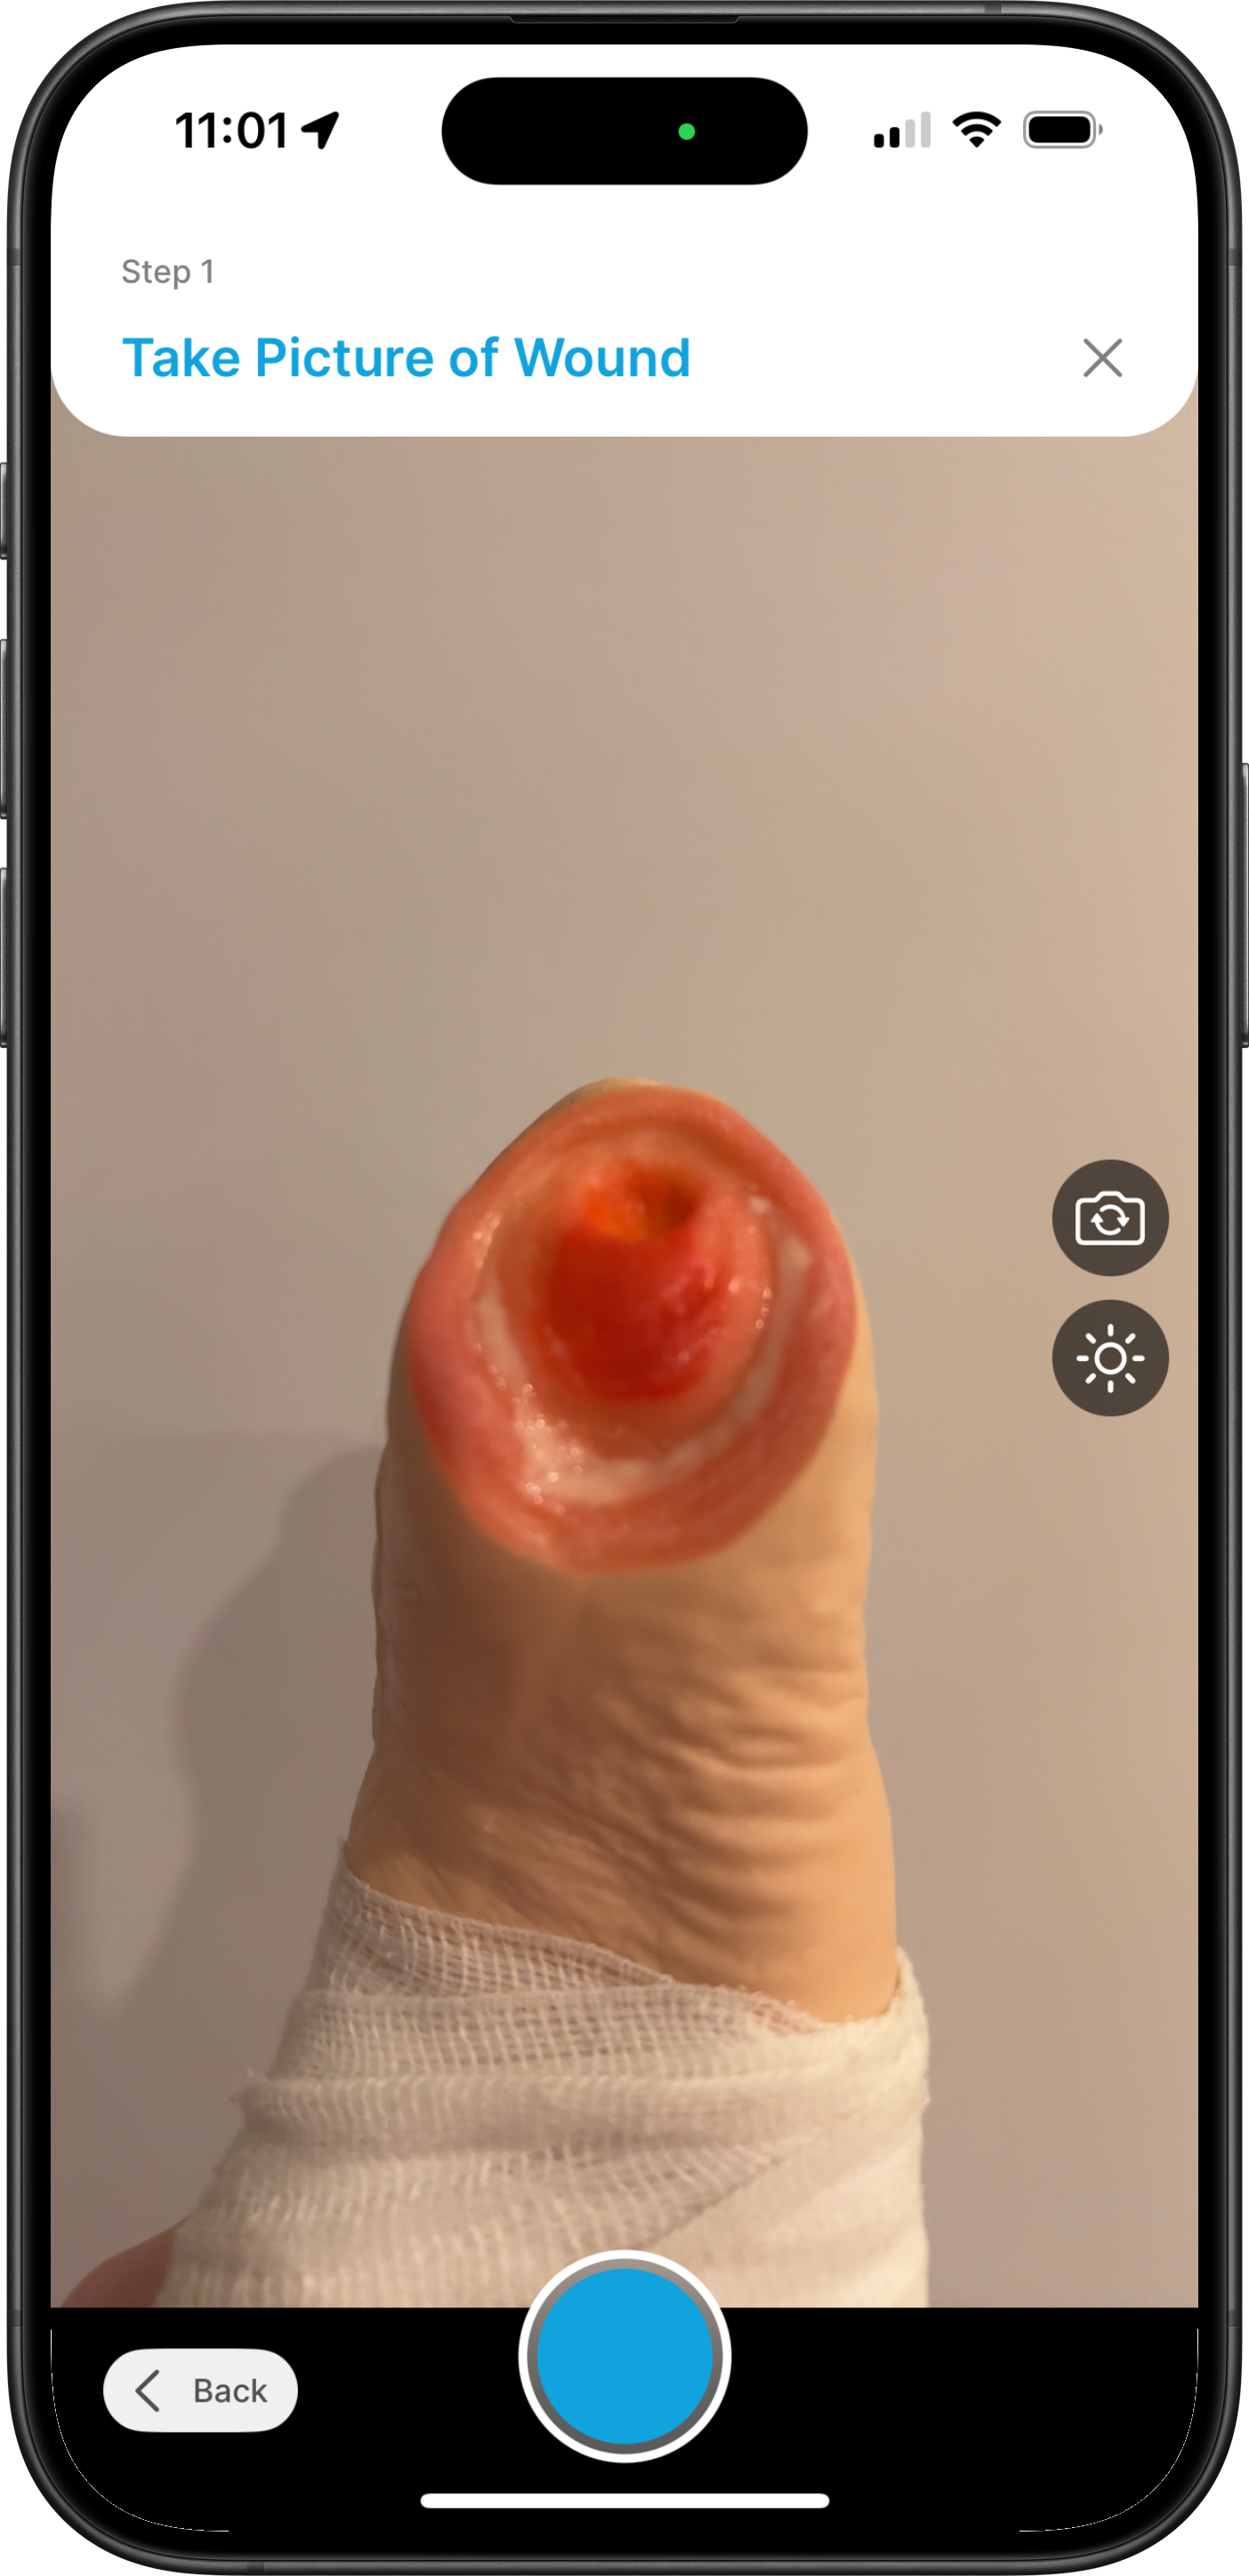
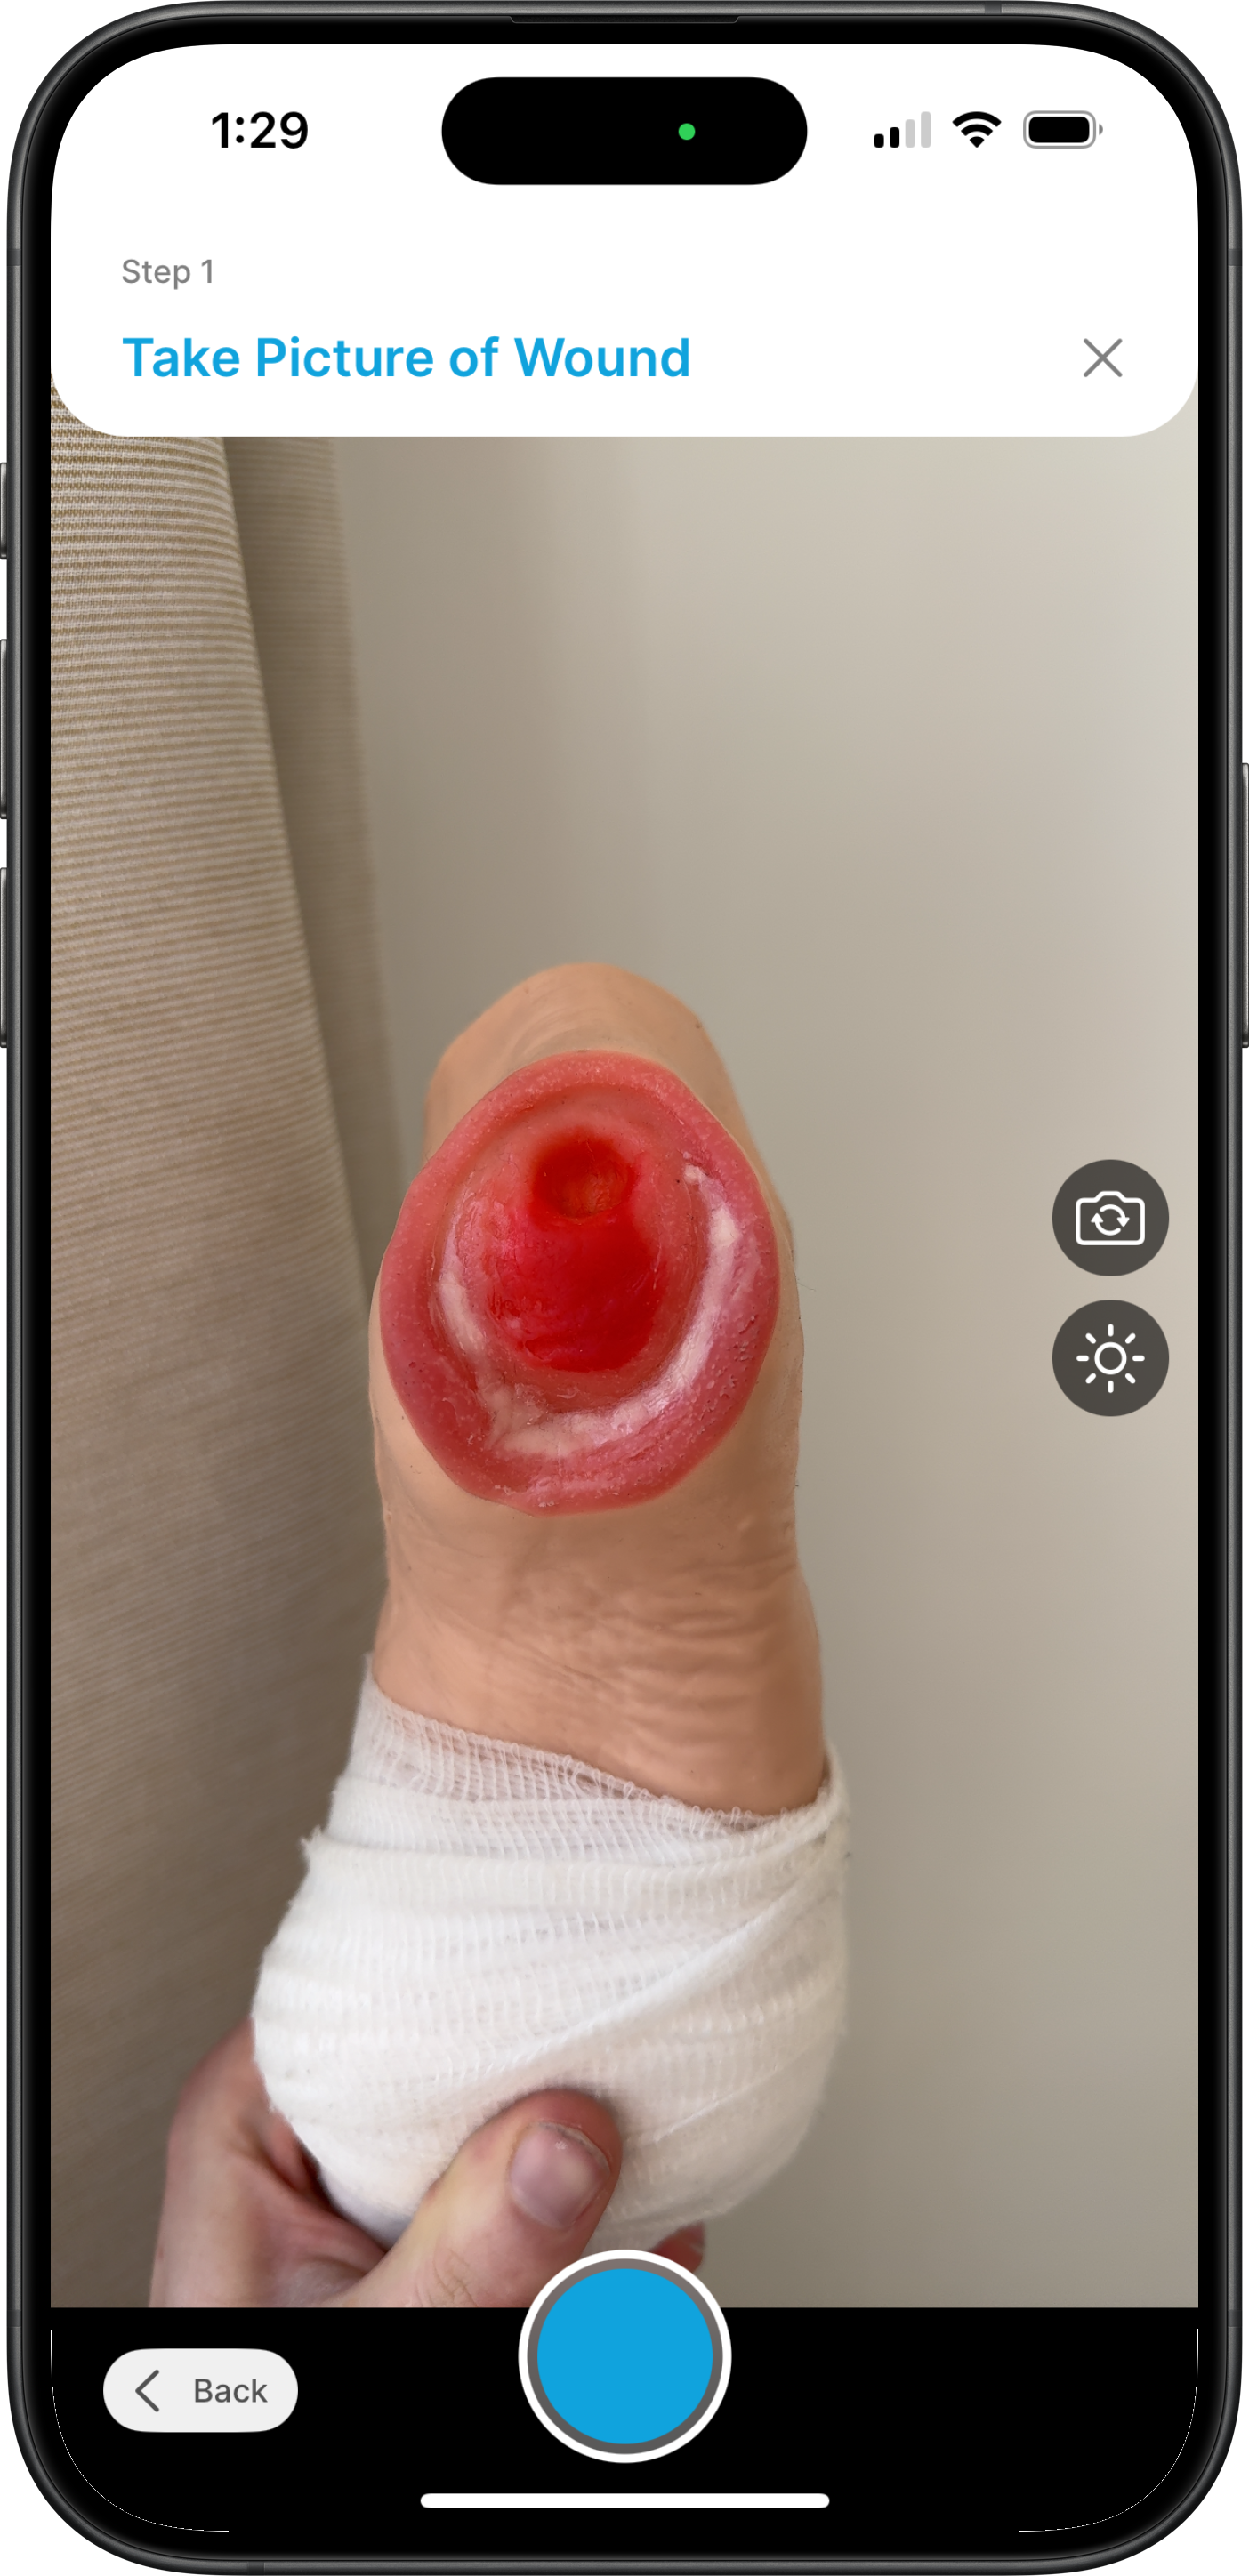
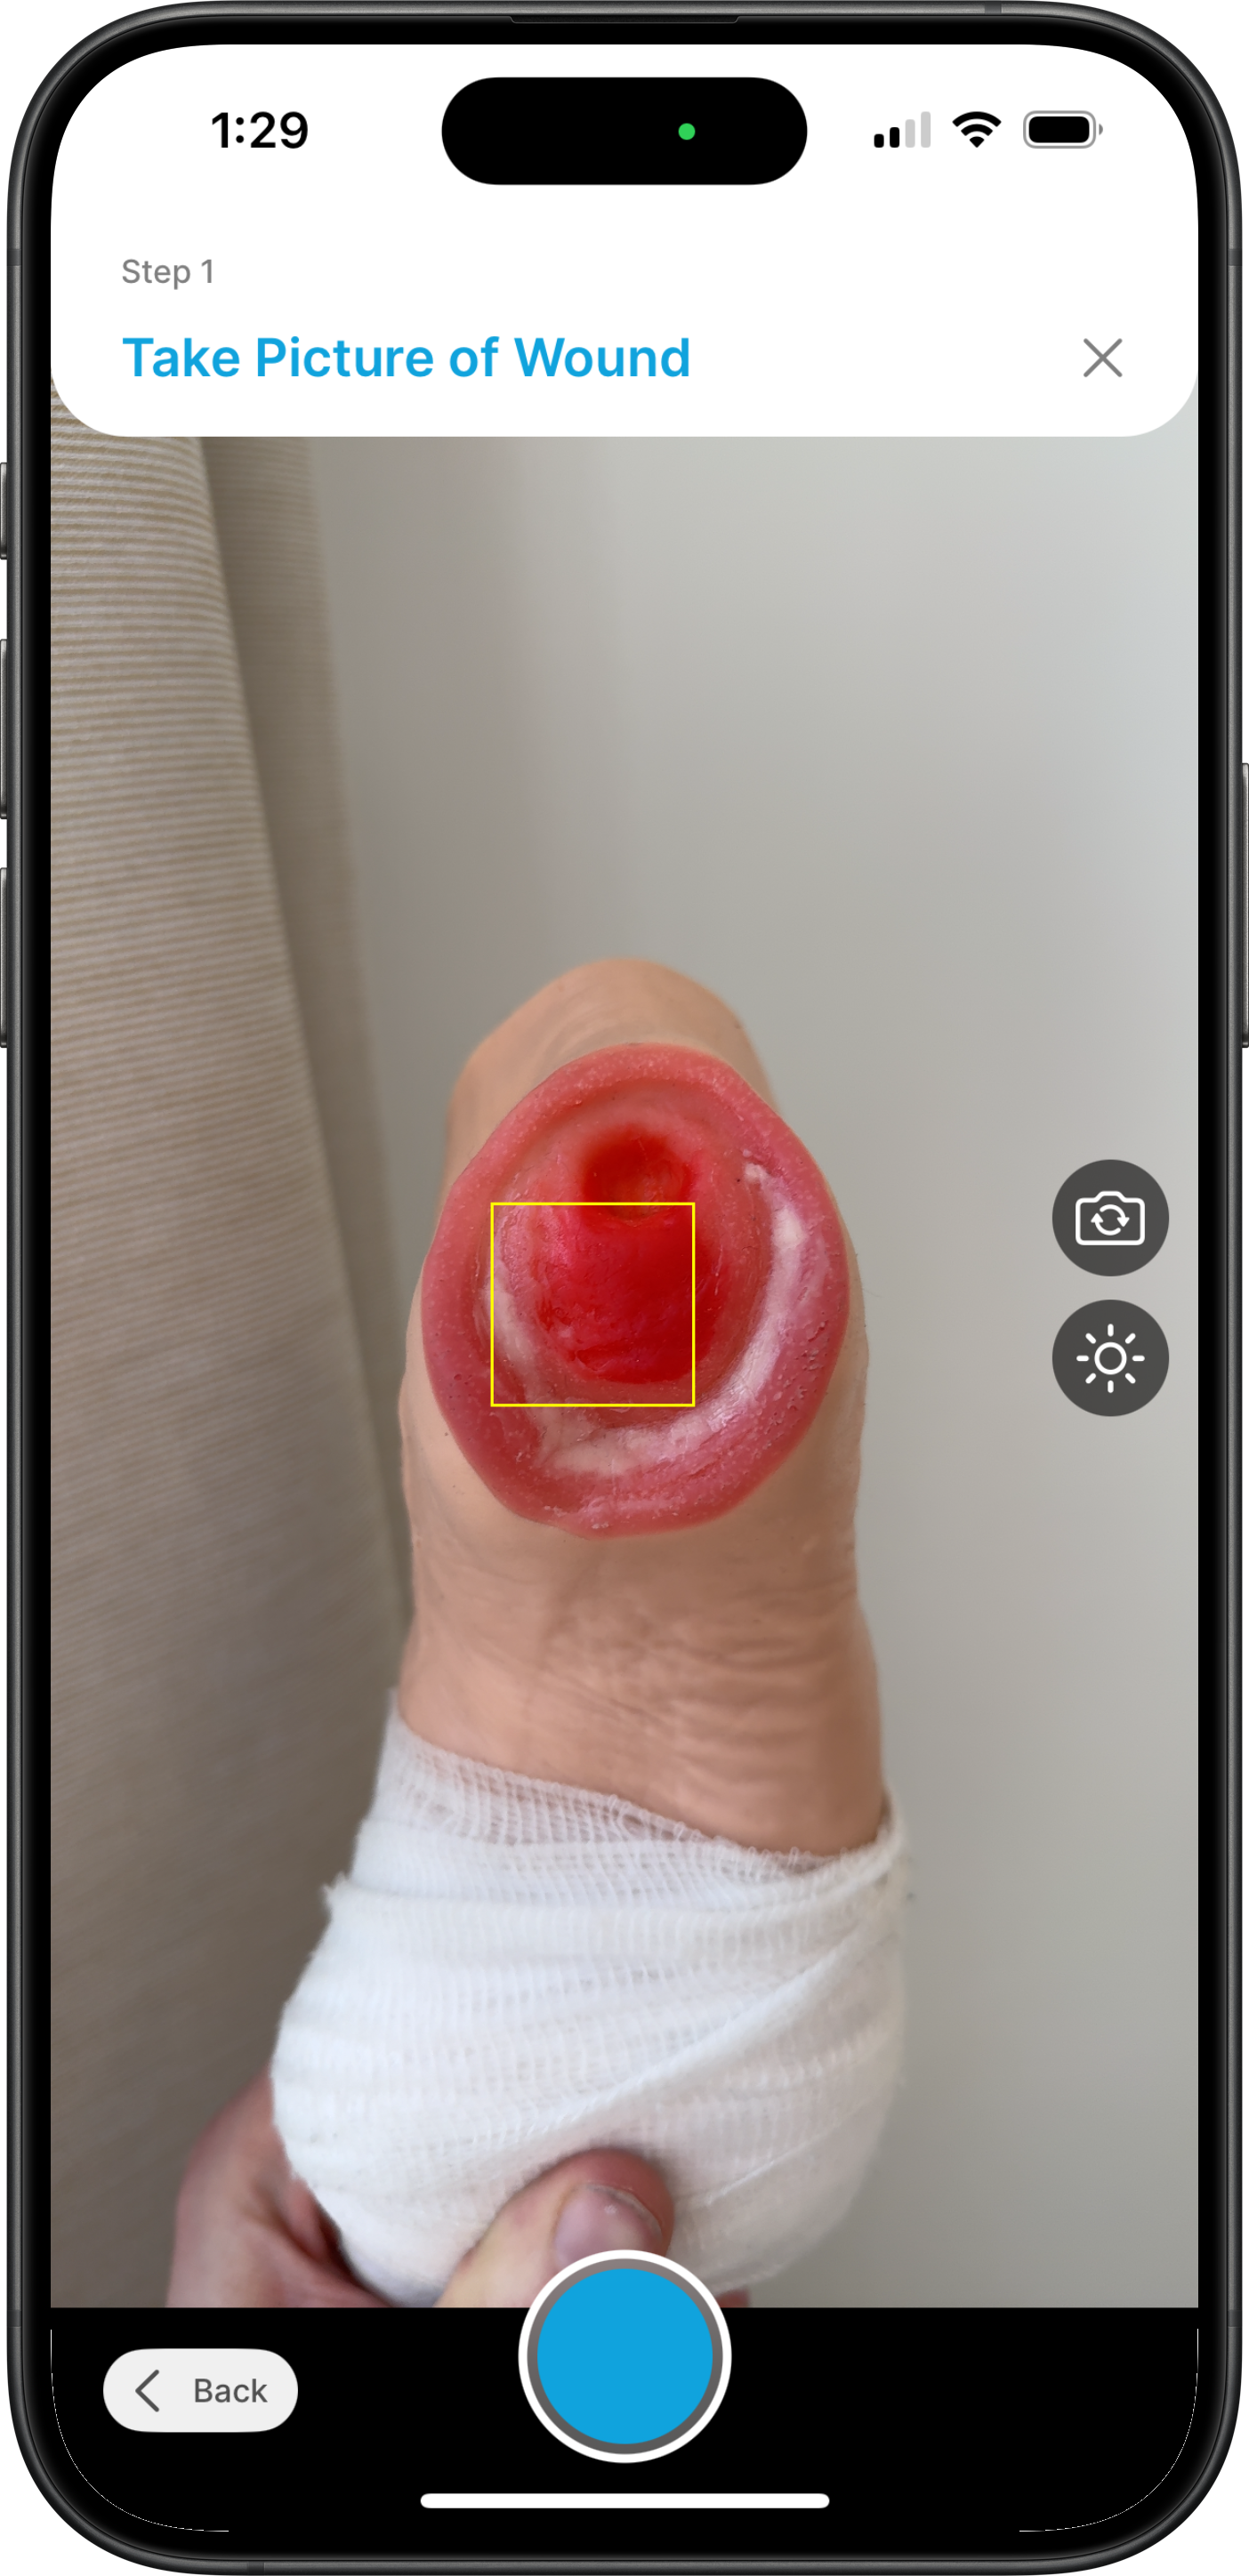
Position the wound at the center of the frame, with your camera approximately a foot away from the wound, and ensure the wound is clearly visible. Then, capture a scan by pressing the circular blue shutter button at the bottom of your screen. Scans capture several images per capture, and therefore take a few seconds to complete.
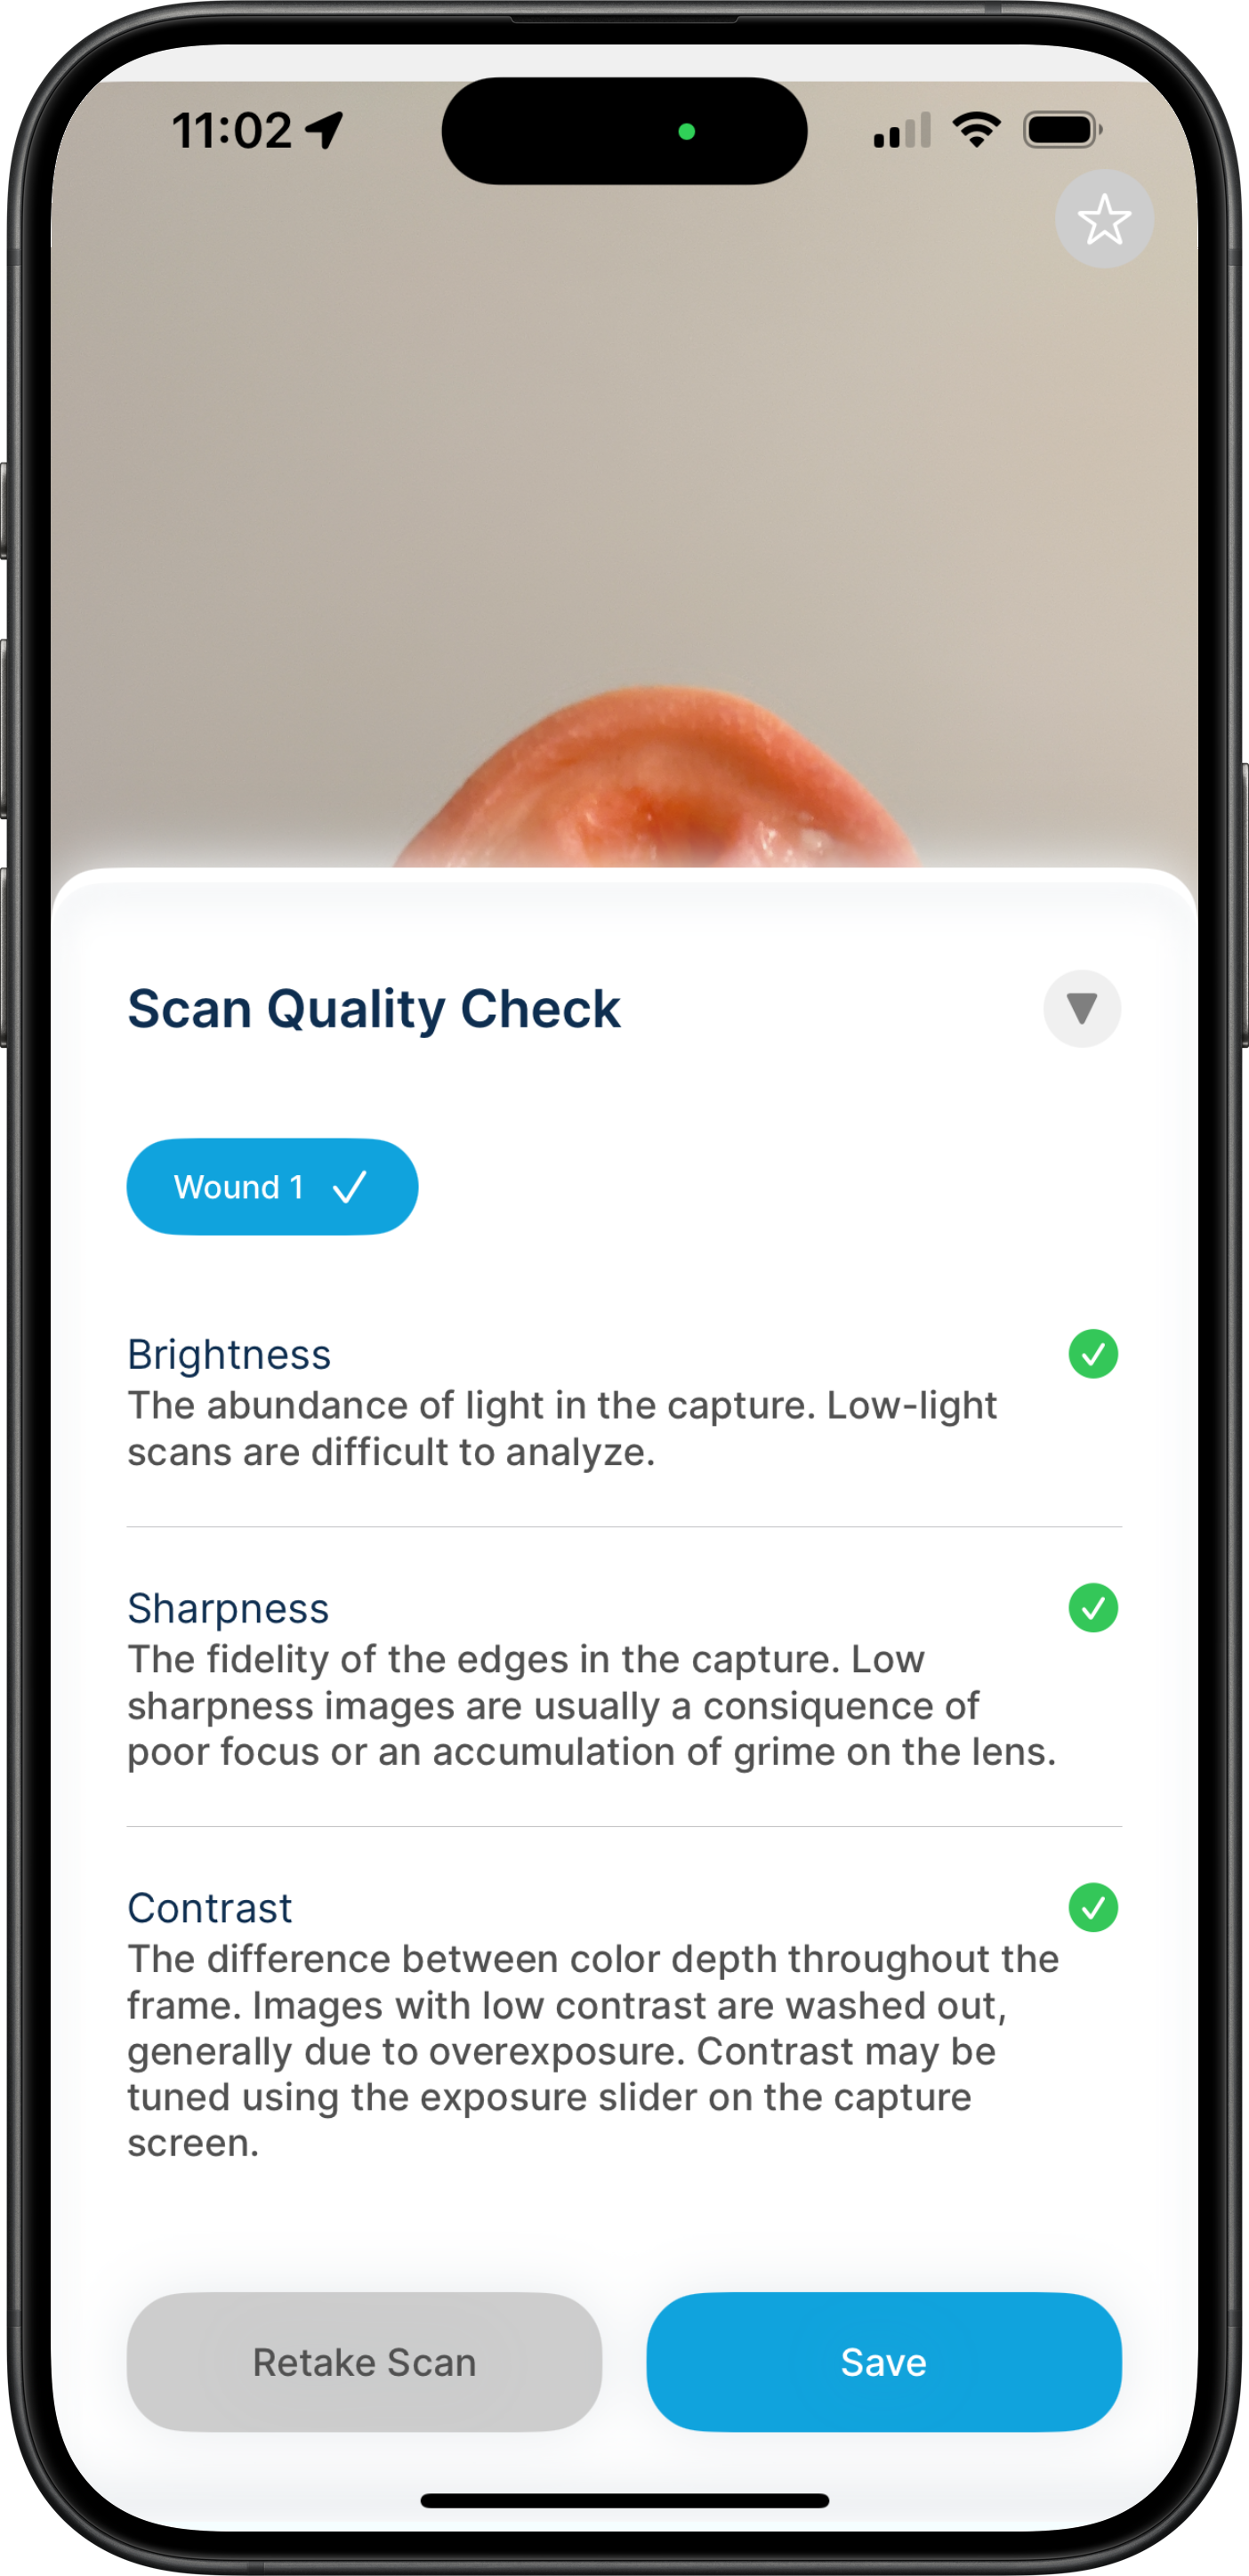
✅ Ensuring High-Quality Scans
The application is designed to validate captures to ensure that all data meets stringent quality standards to ensure care providers get the data they need. (see: Data Validation Criteria). During the scan capture process, there are two features to refine the quality of your scans: exposure compensation and tap to focus.
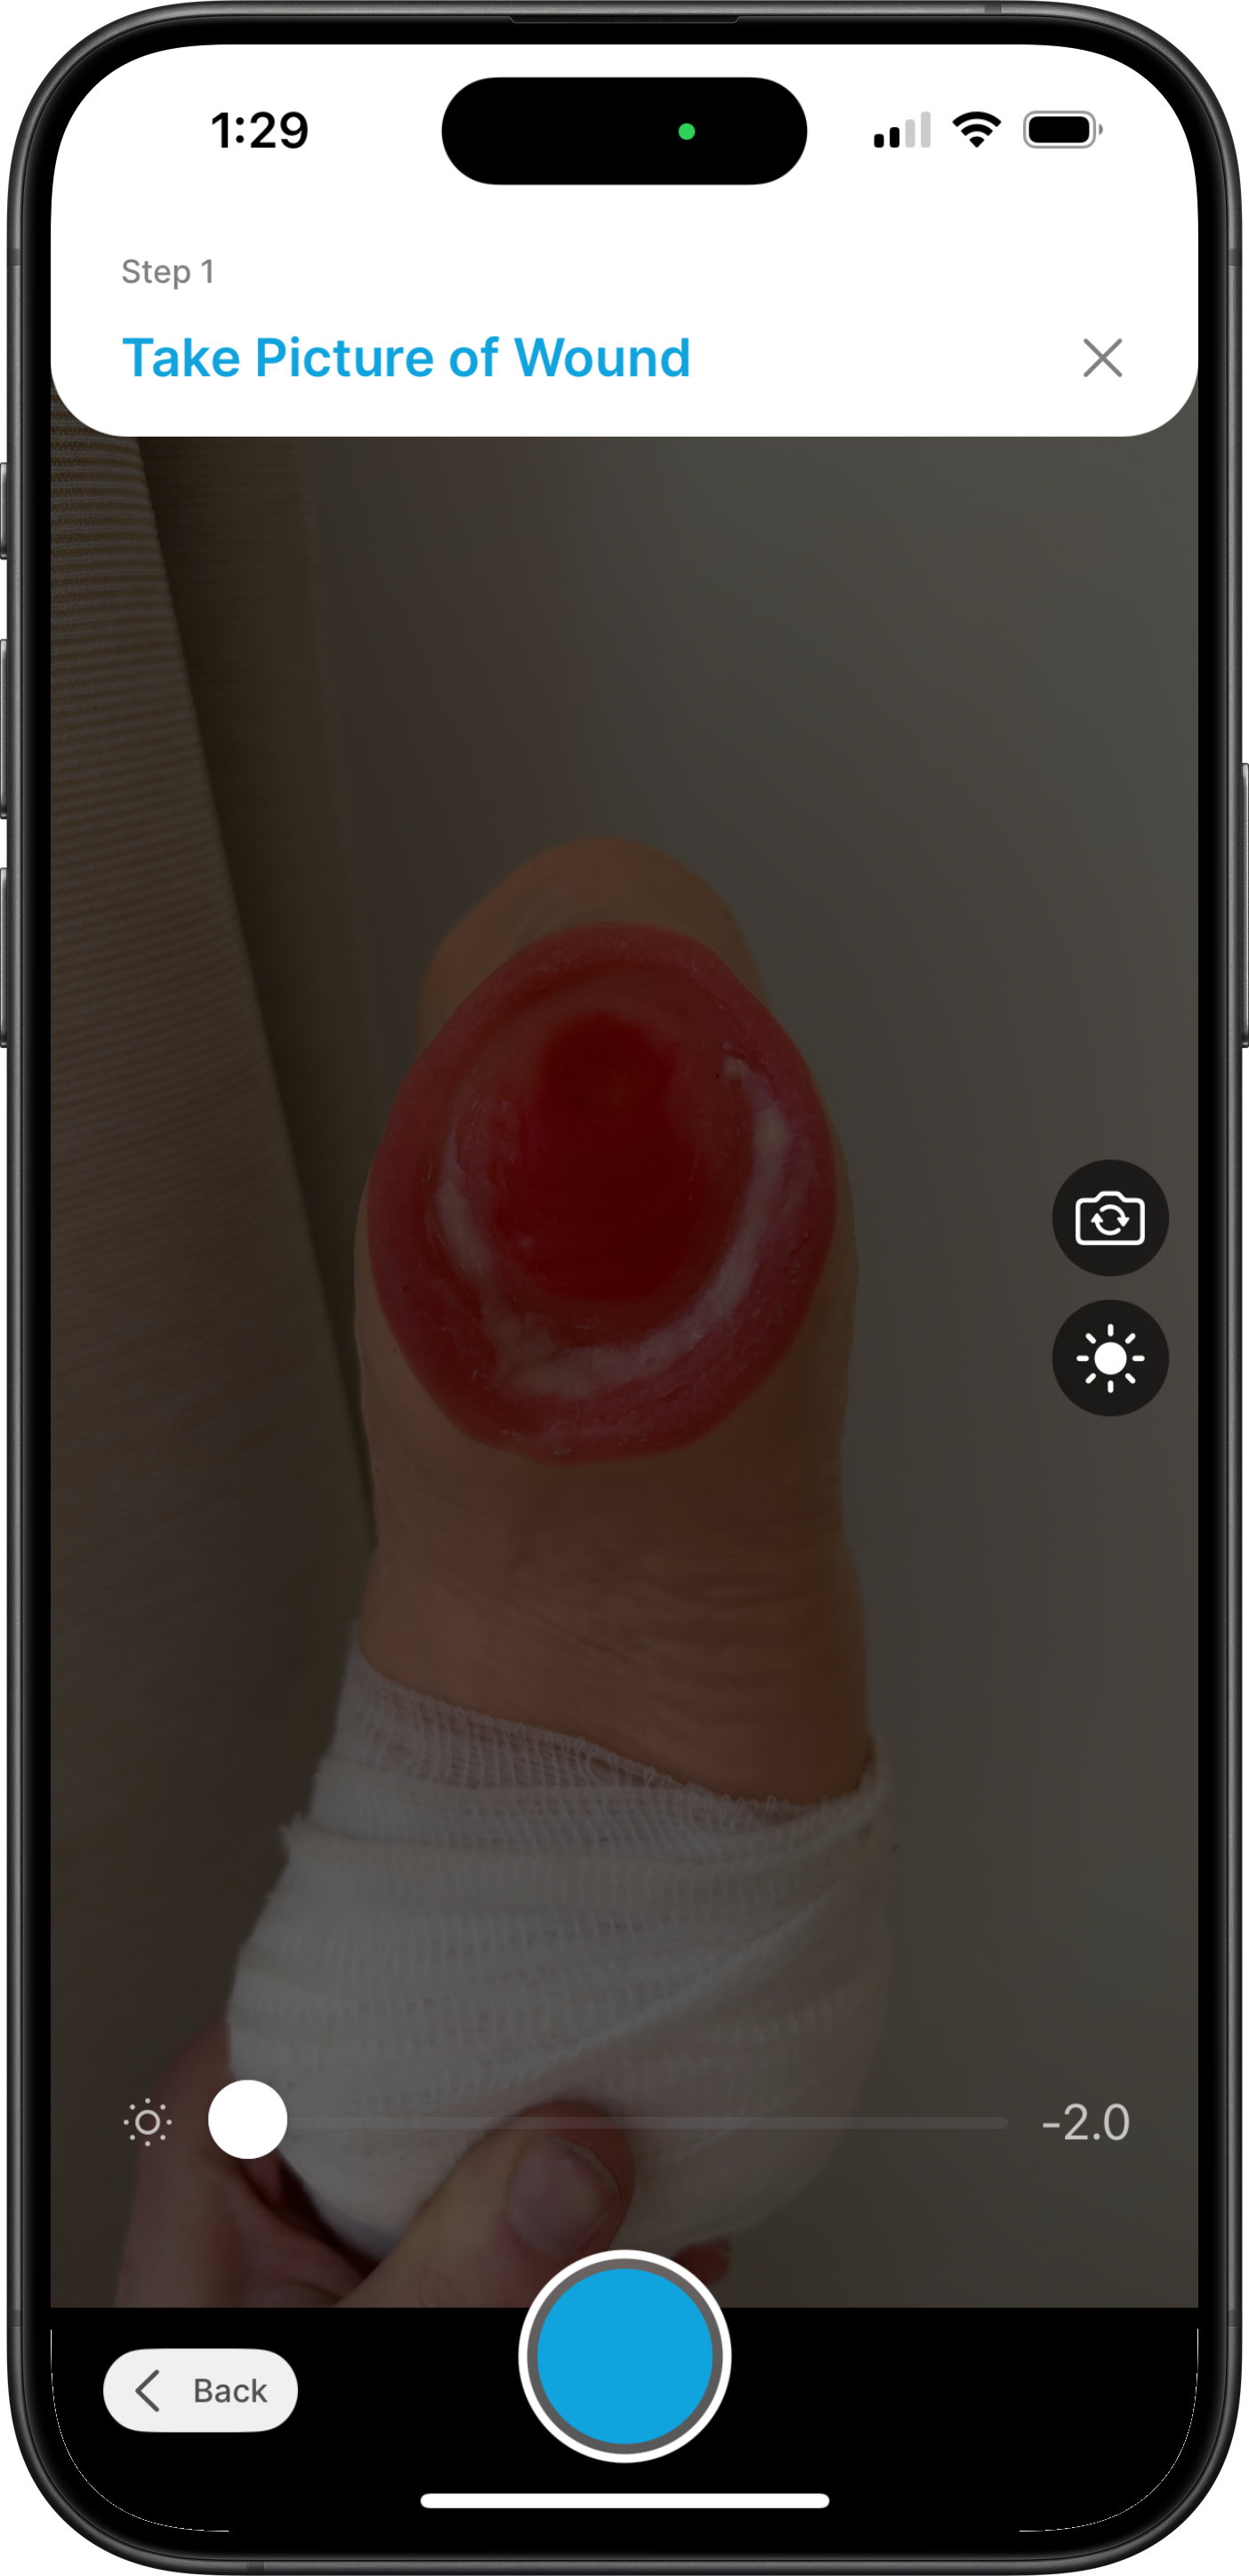
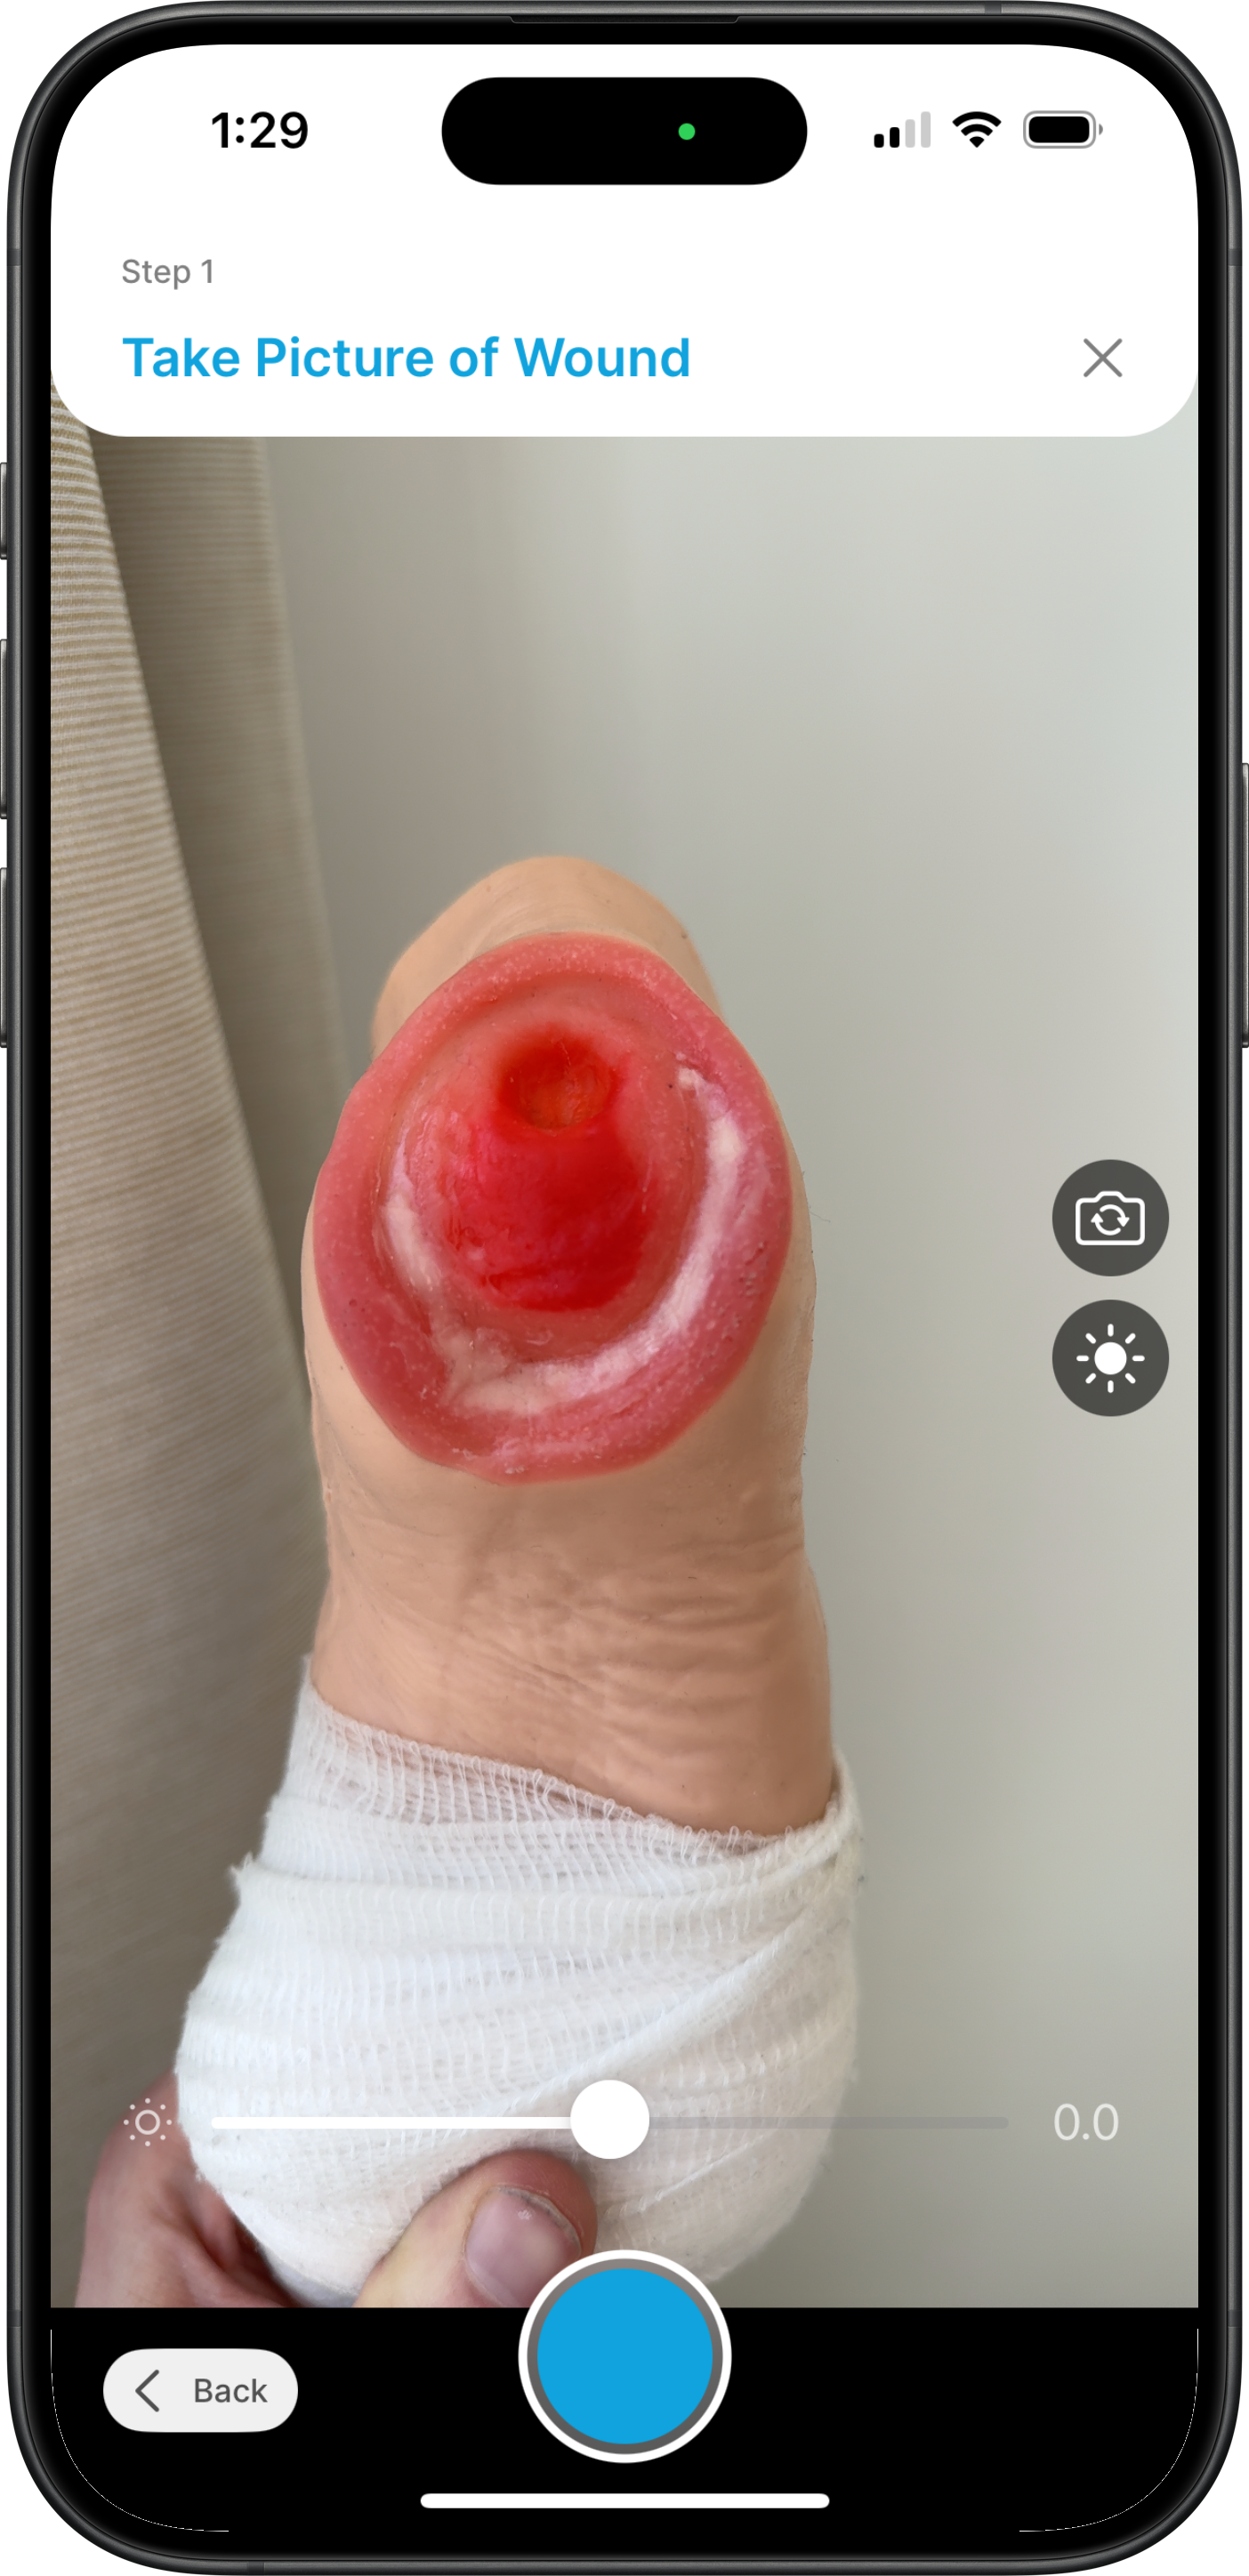
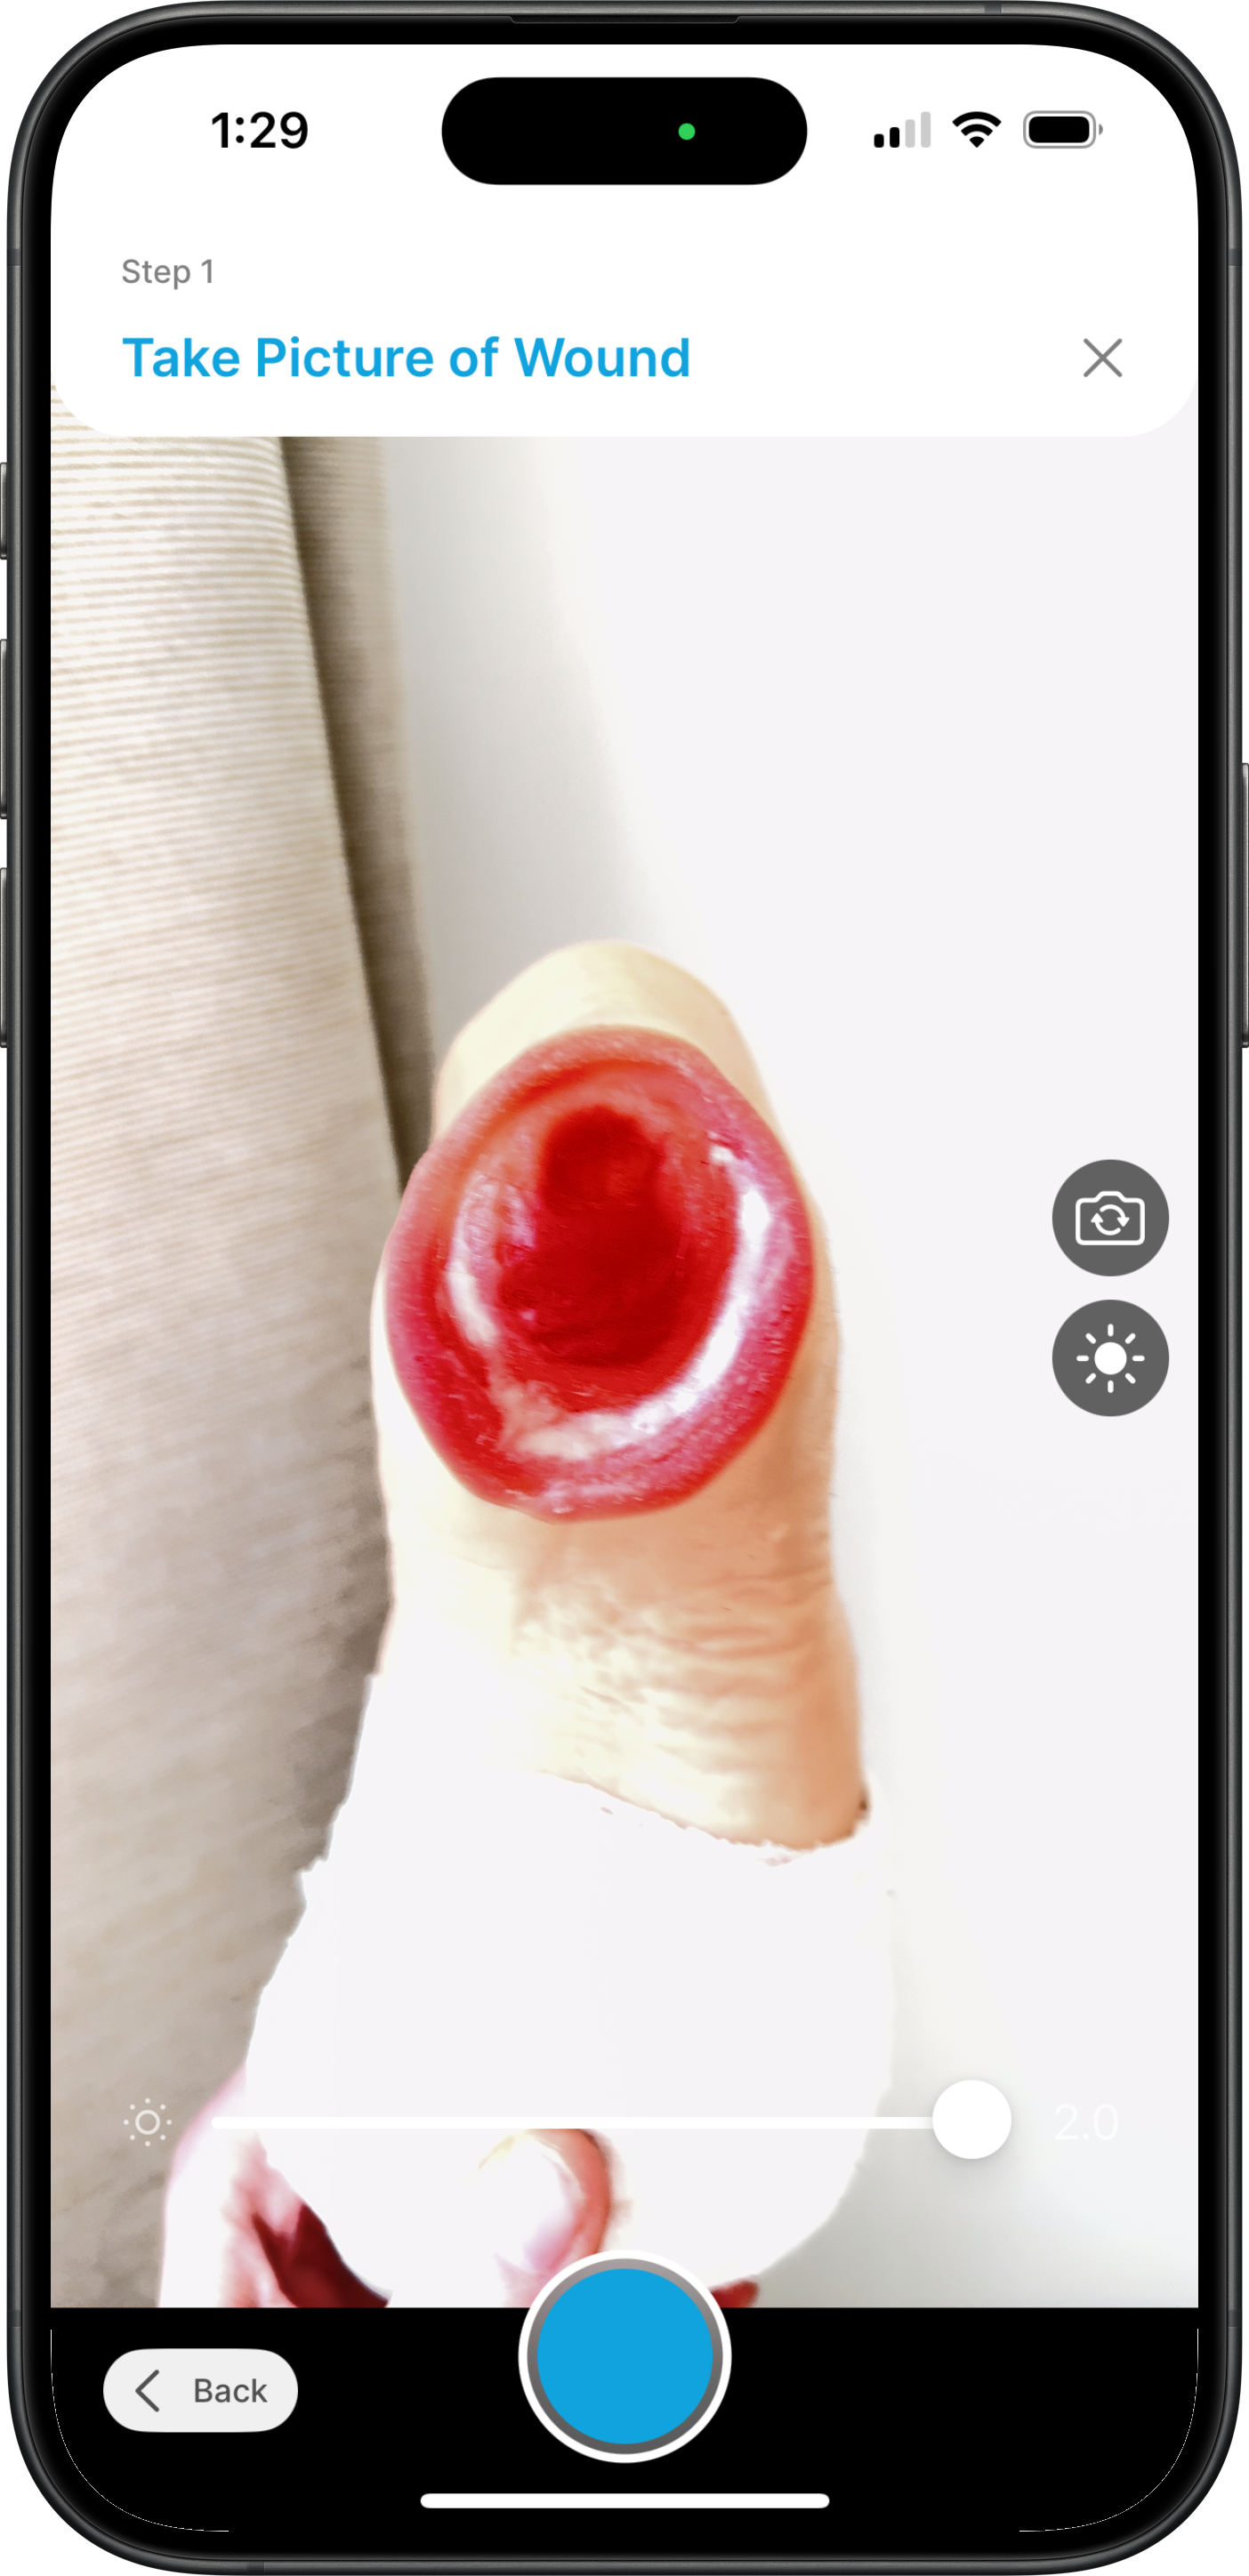
🔅🎚️ Changing Exposure / Contrast
By tapping the Sun button, you will be given a slider at the bottom the screen which you can use to adjust the image. Adjusting the contrast is especially important in OR settings, as OR lights may wash out the affected area. You should be able to clearly see the wound in the image (even if that means contrasting out the background).
If the contrast is still too low, our system will provide you with a Contrast error.
You can resolve this by adjusting this slider or moving to a location with diffuse lighting.
👁️✨ Tap to Focus
If the image appears out of focus, tap the wound on the screen to trigger auto-focus. This will fix most blurry images. If you move your camera or the wound, the image may become out of focus again: simply tap the wound on the screen again to re-focus.
🖌️ Masking
To detect the wound, the application will generate a mask. There are two methods you can select to generate this mask: Manual or AI-assisted.
✏️ Manual Masking
Manual masking allows you to draw a mask over the desired area of the image. This is particularly useful for small wounds or wounds without a clearly discernable edge.
💡Tip: Most surgical wounds are best for manual masking, as they tend to be narrow and potentially obscured by sutures. Manual masking is also advantageous in areas with weak or no internet connection.
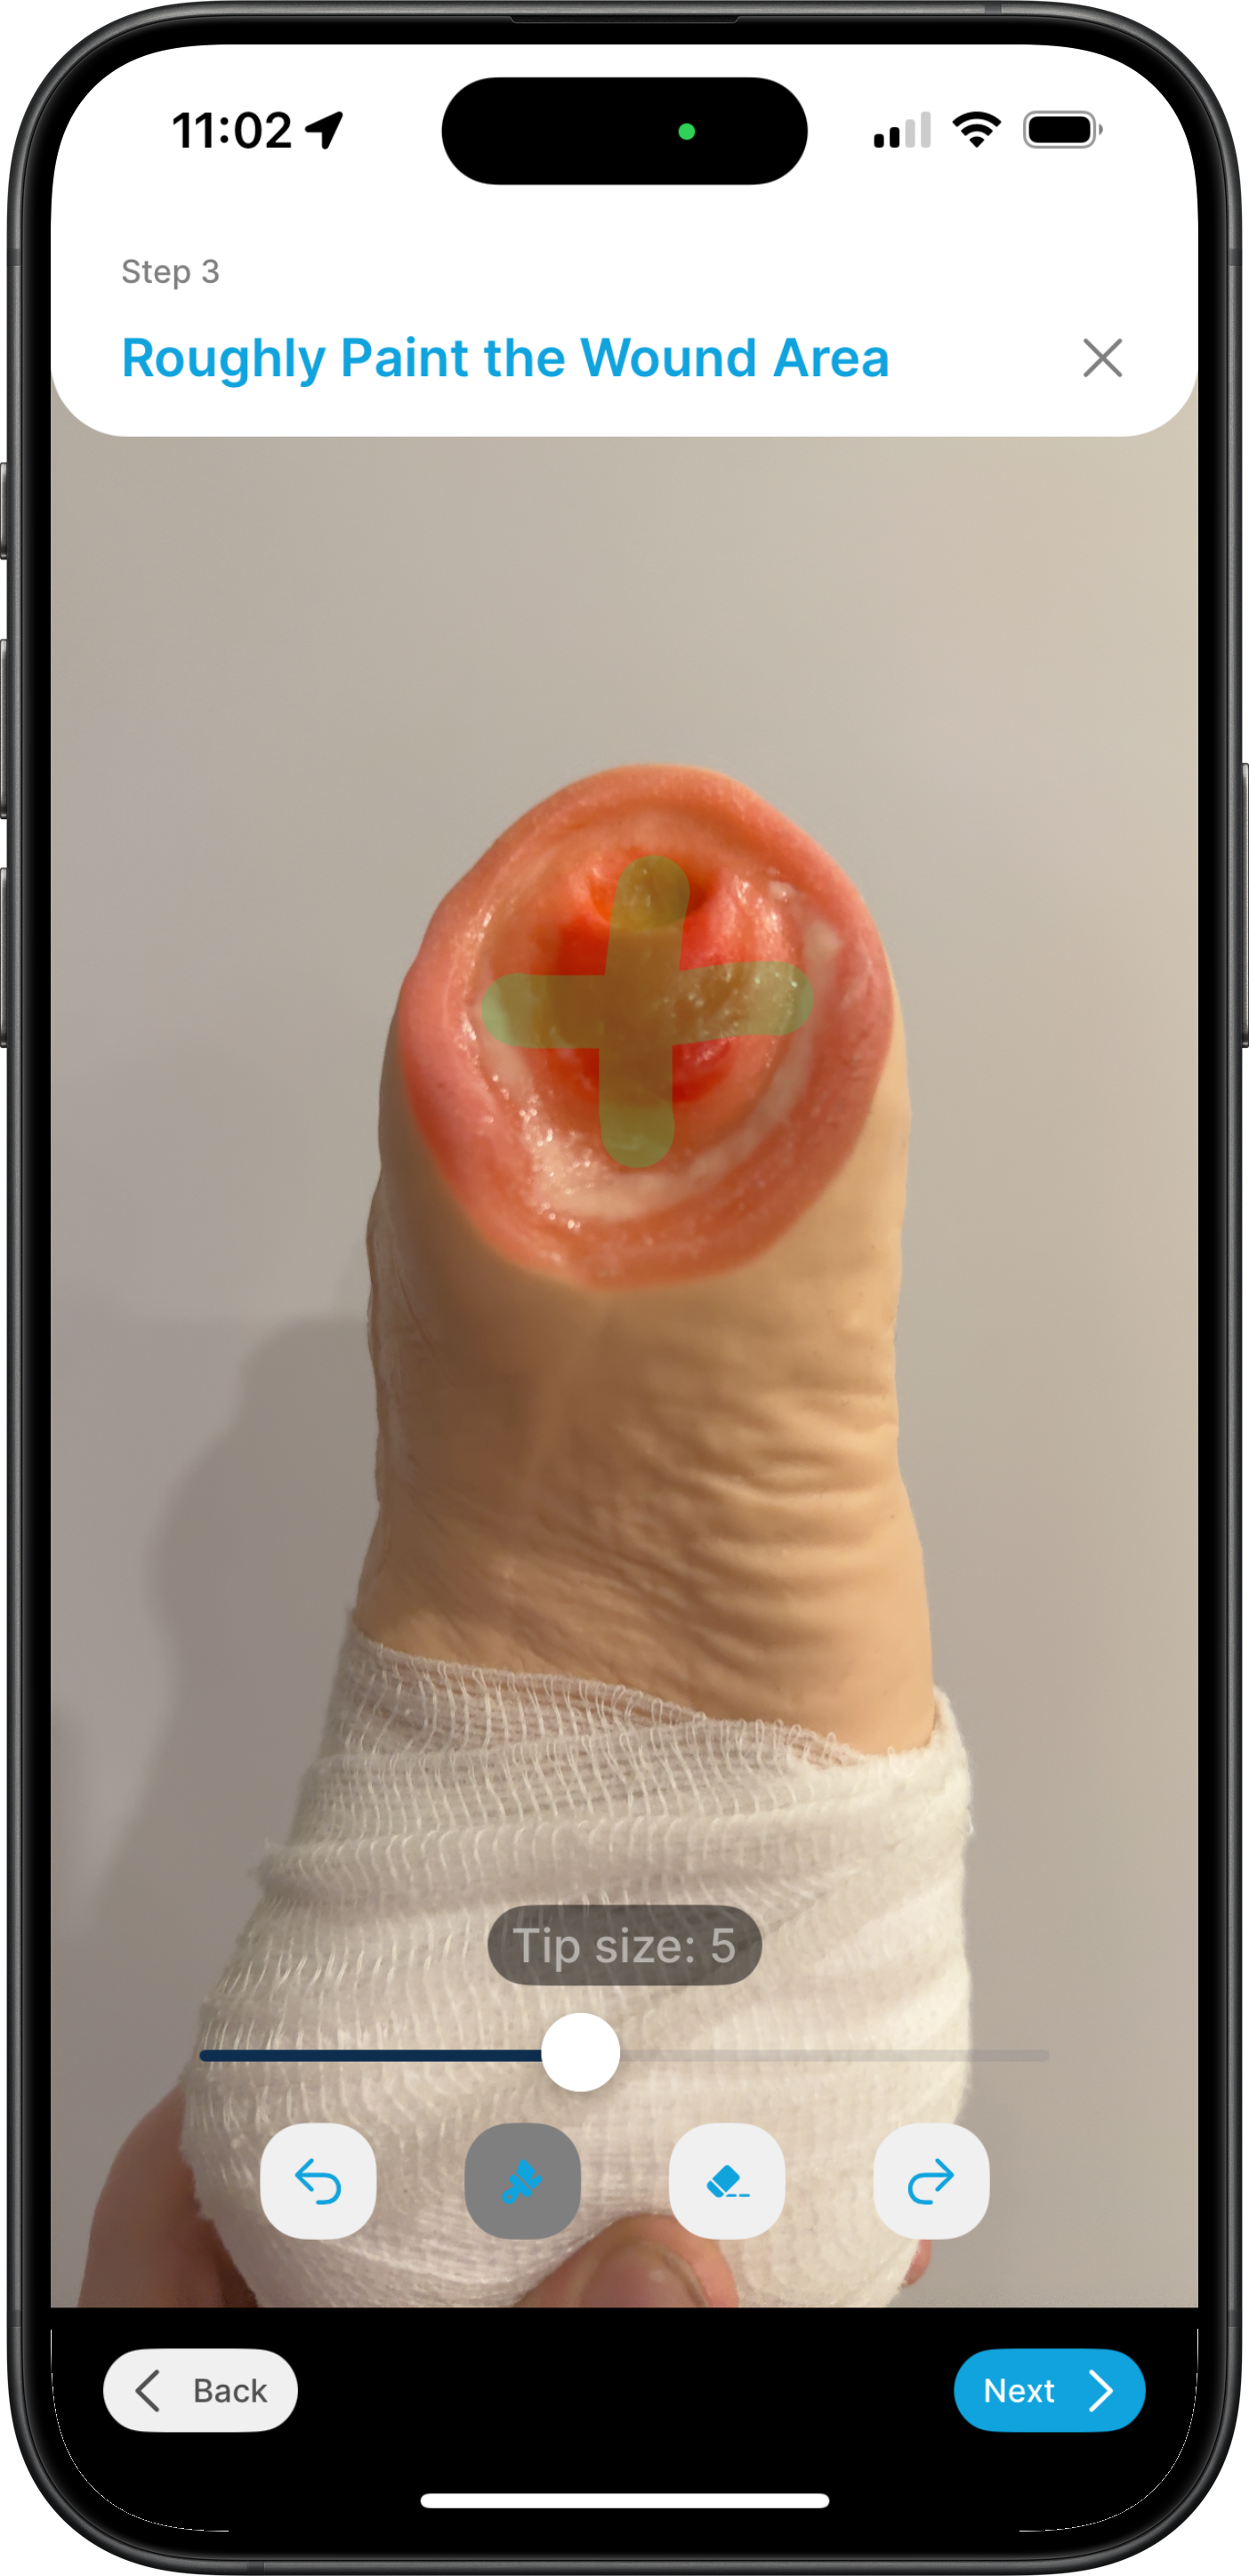
To draw a manual mask, click the paintbrush and draw over the region that contains the wound. You can adjust the size of your paintbrush using the slider.
If you make a mistake and need to adjust your mask, just like with the AI masking, you can add areas using the paintbrush or remove areas using the eraser.
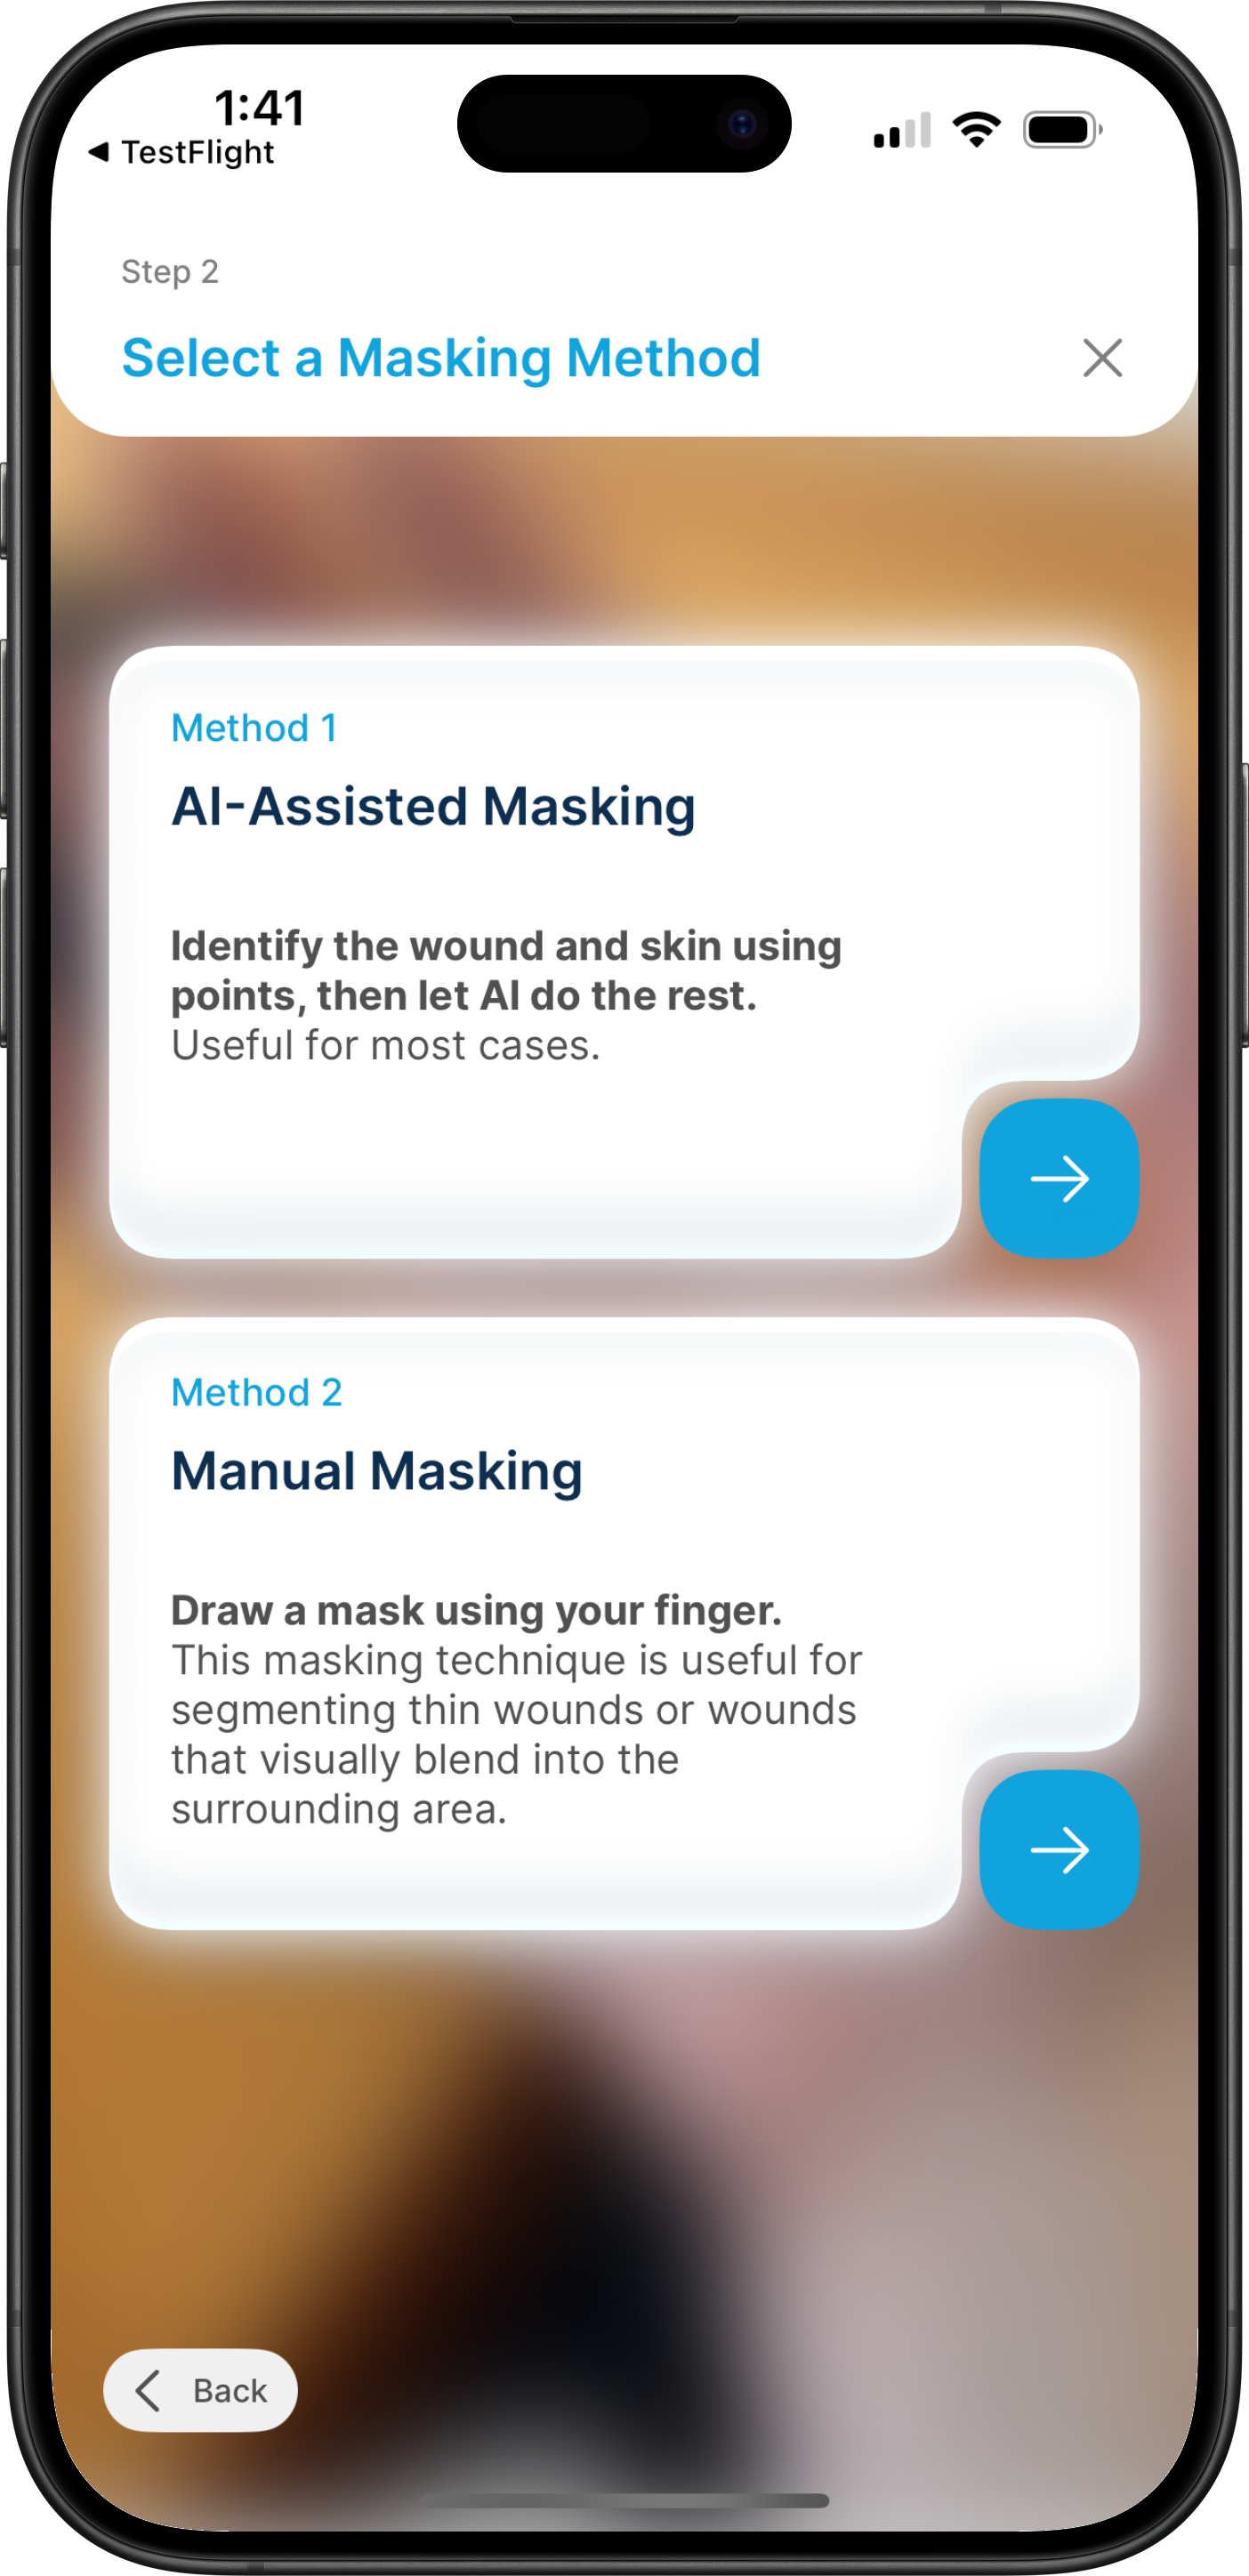
🤖 AI-Assisted Masking
🛜 Note: To use AI-assisted masking, a strong, stable, and fast internet connection is required.
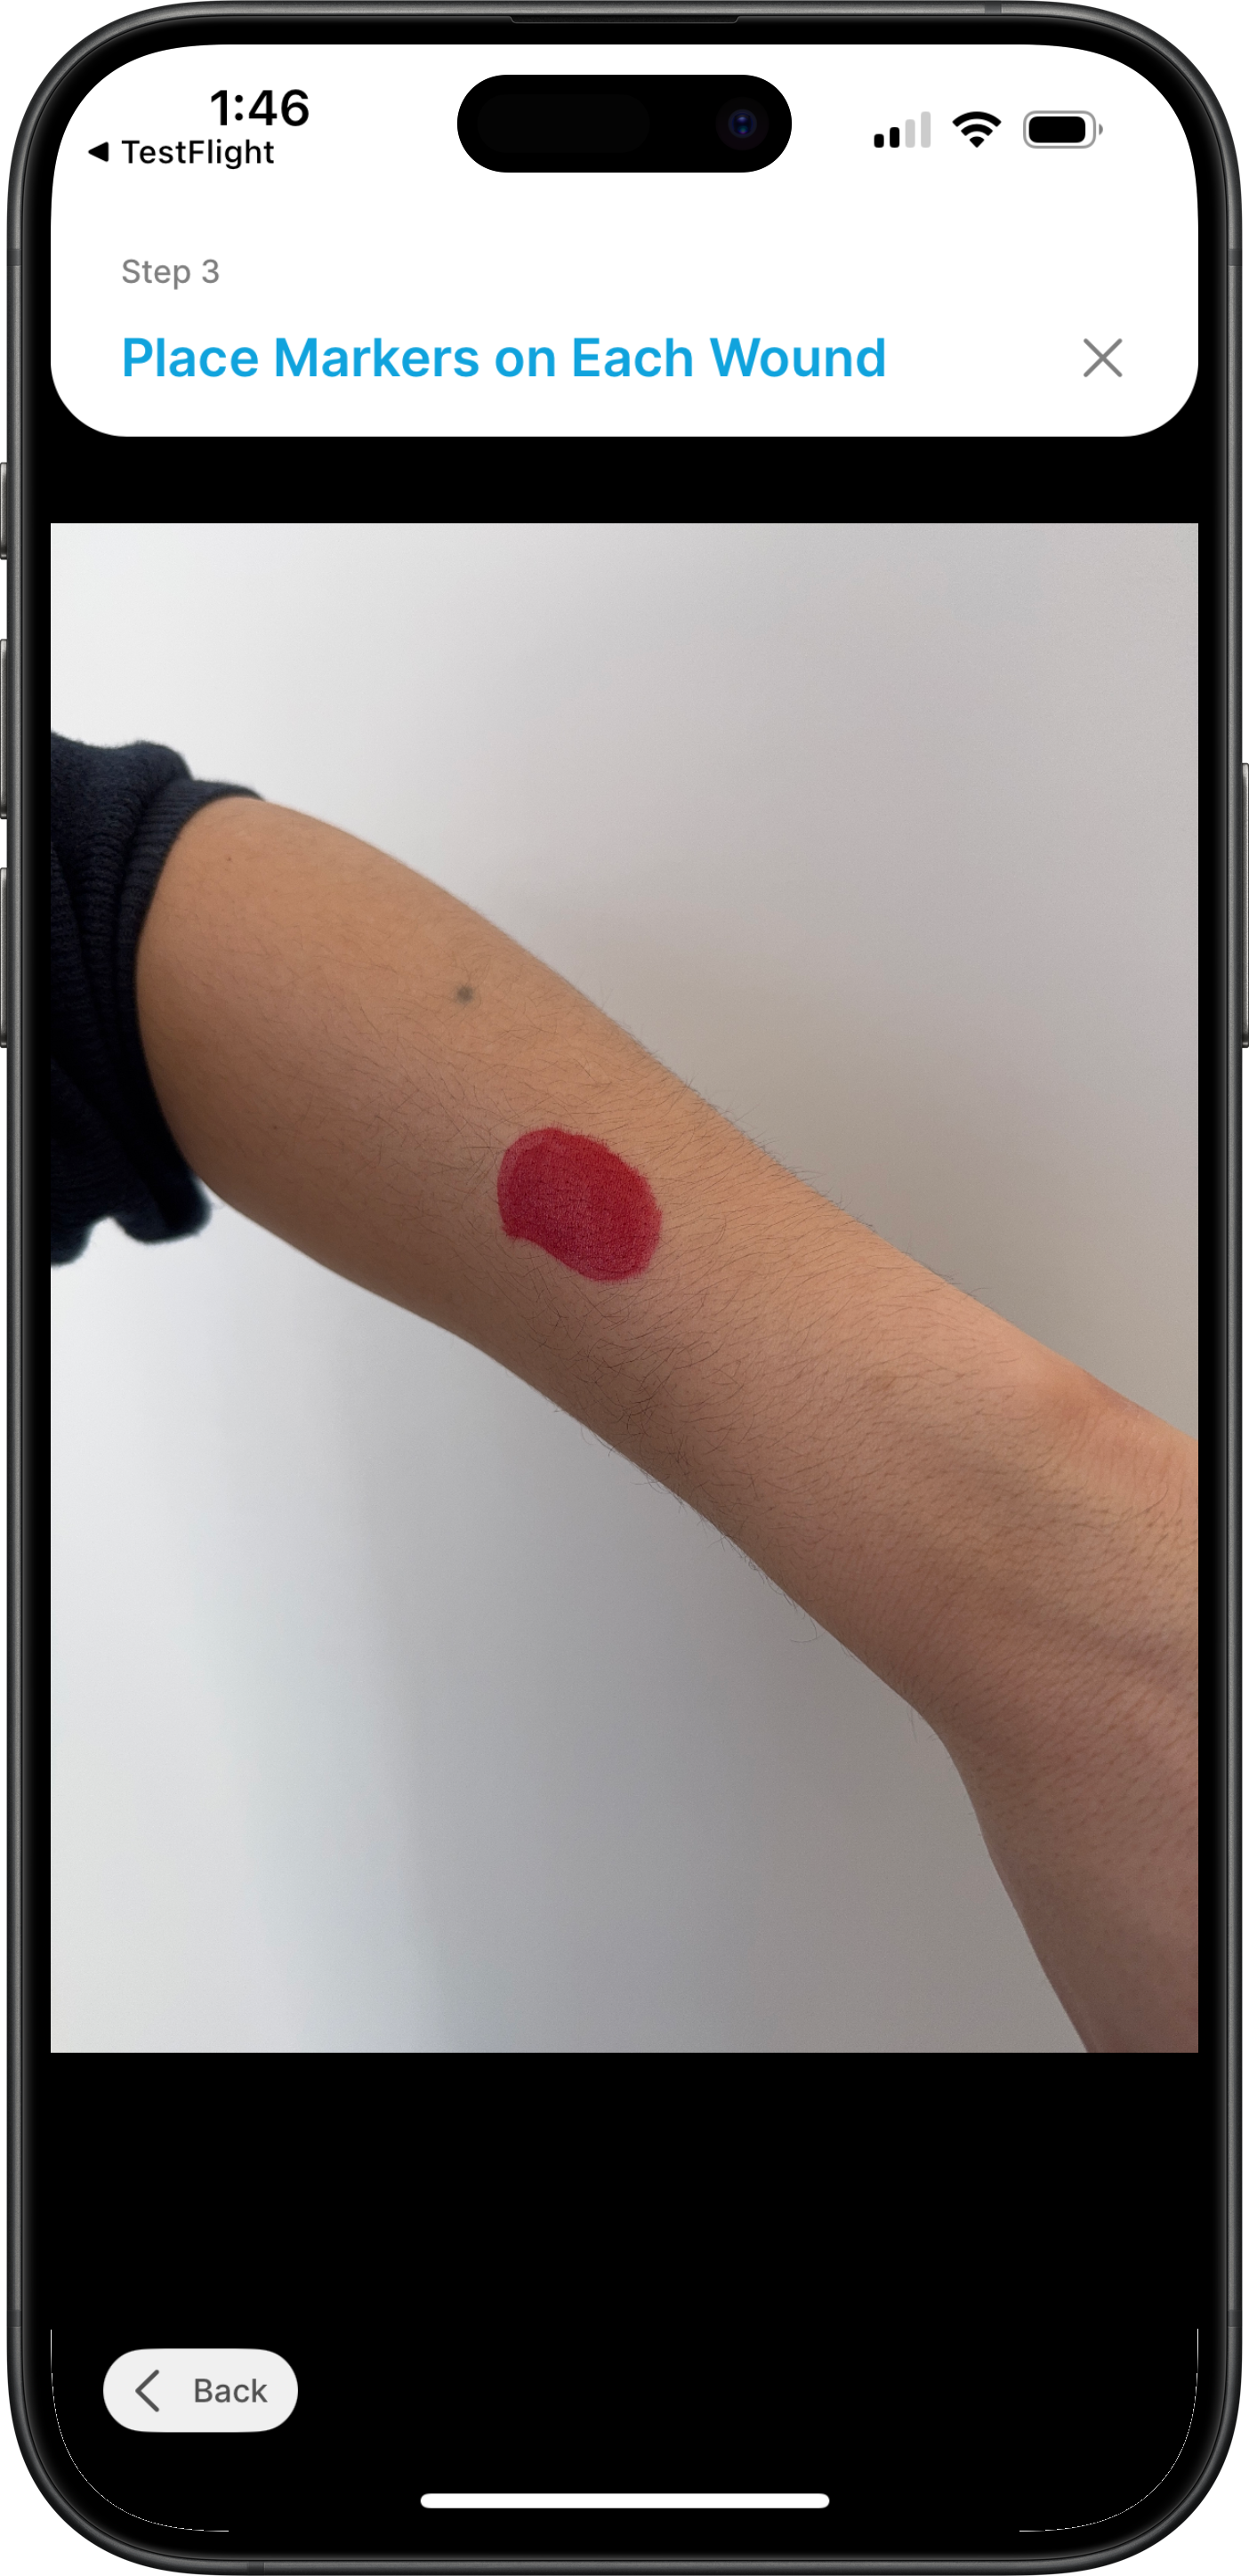
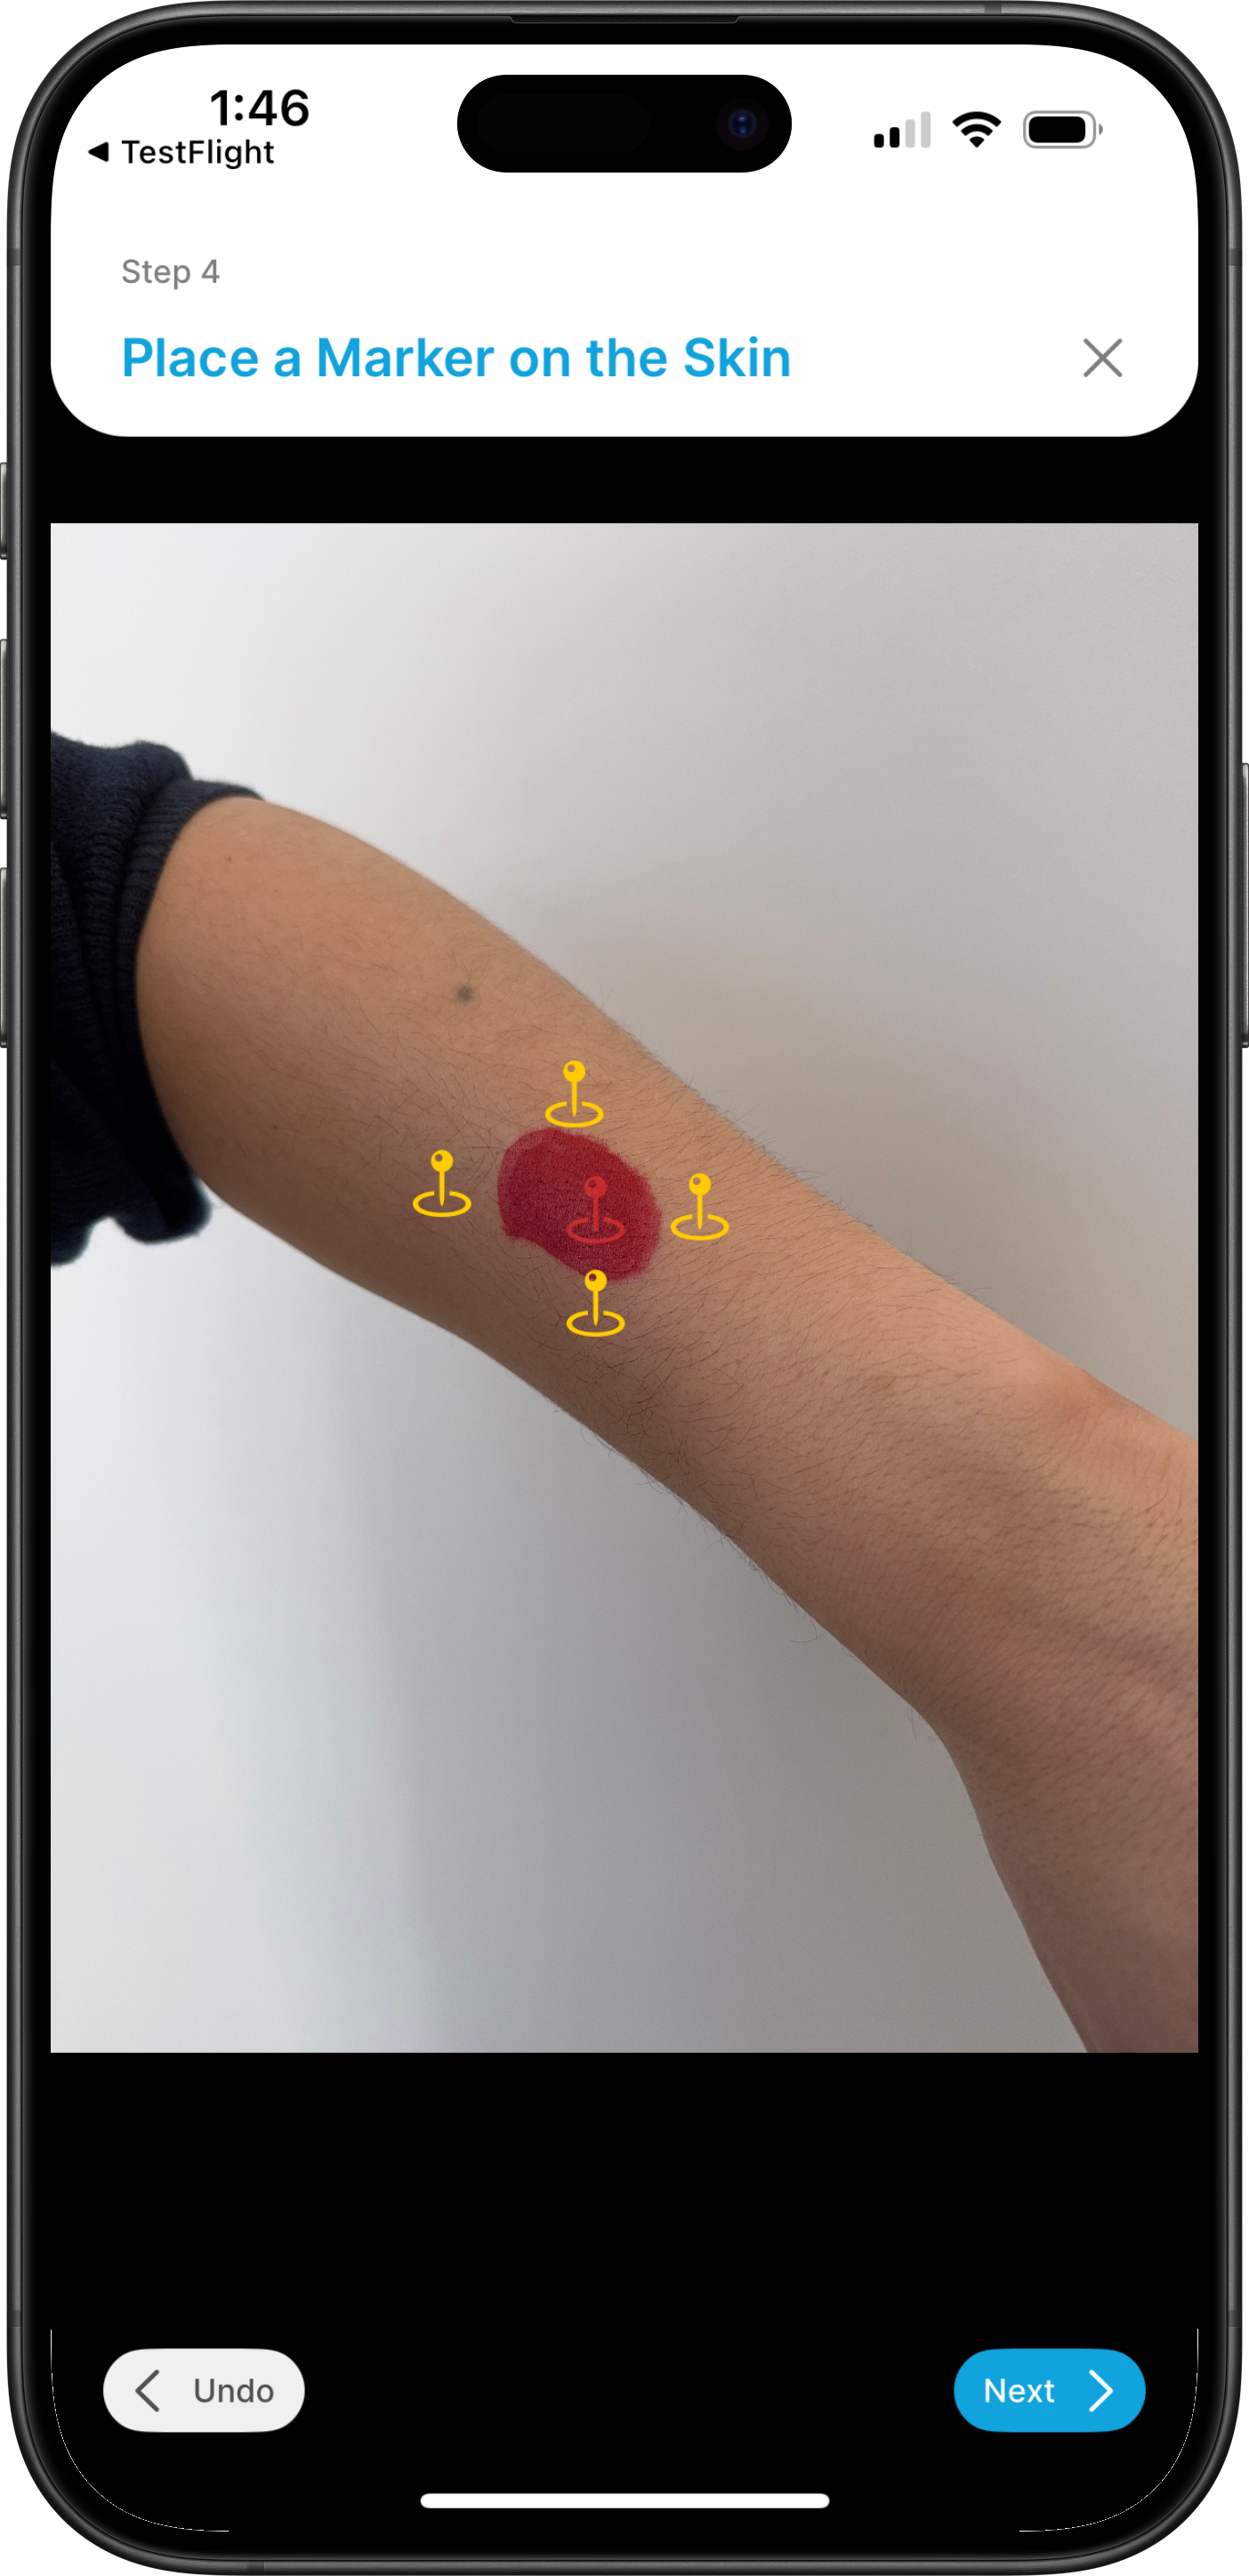
AI-assisted masking is convenient for larger wounds, particularly those with a clearly discernable edge. To generate an AI-assisted mask:
- Select one or more points on the wound. When you are done, press
Next. - Select one or more points on the unaffected skin. When you are done, press
Next. The mask will then auto-generate over the detected wound area.
You may touch-up the mask using the paintbrush to add areas the AI mask missed, or using the eraser to remove areas the AI mask should not have included.


💾 Saving the Scan
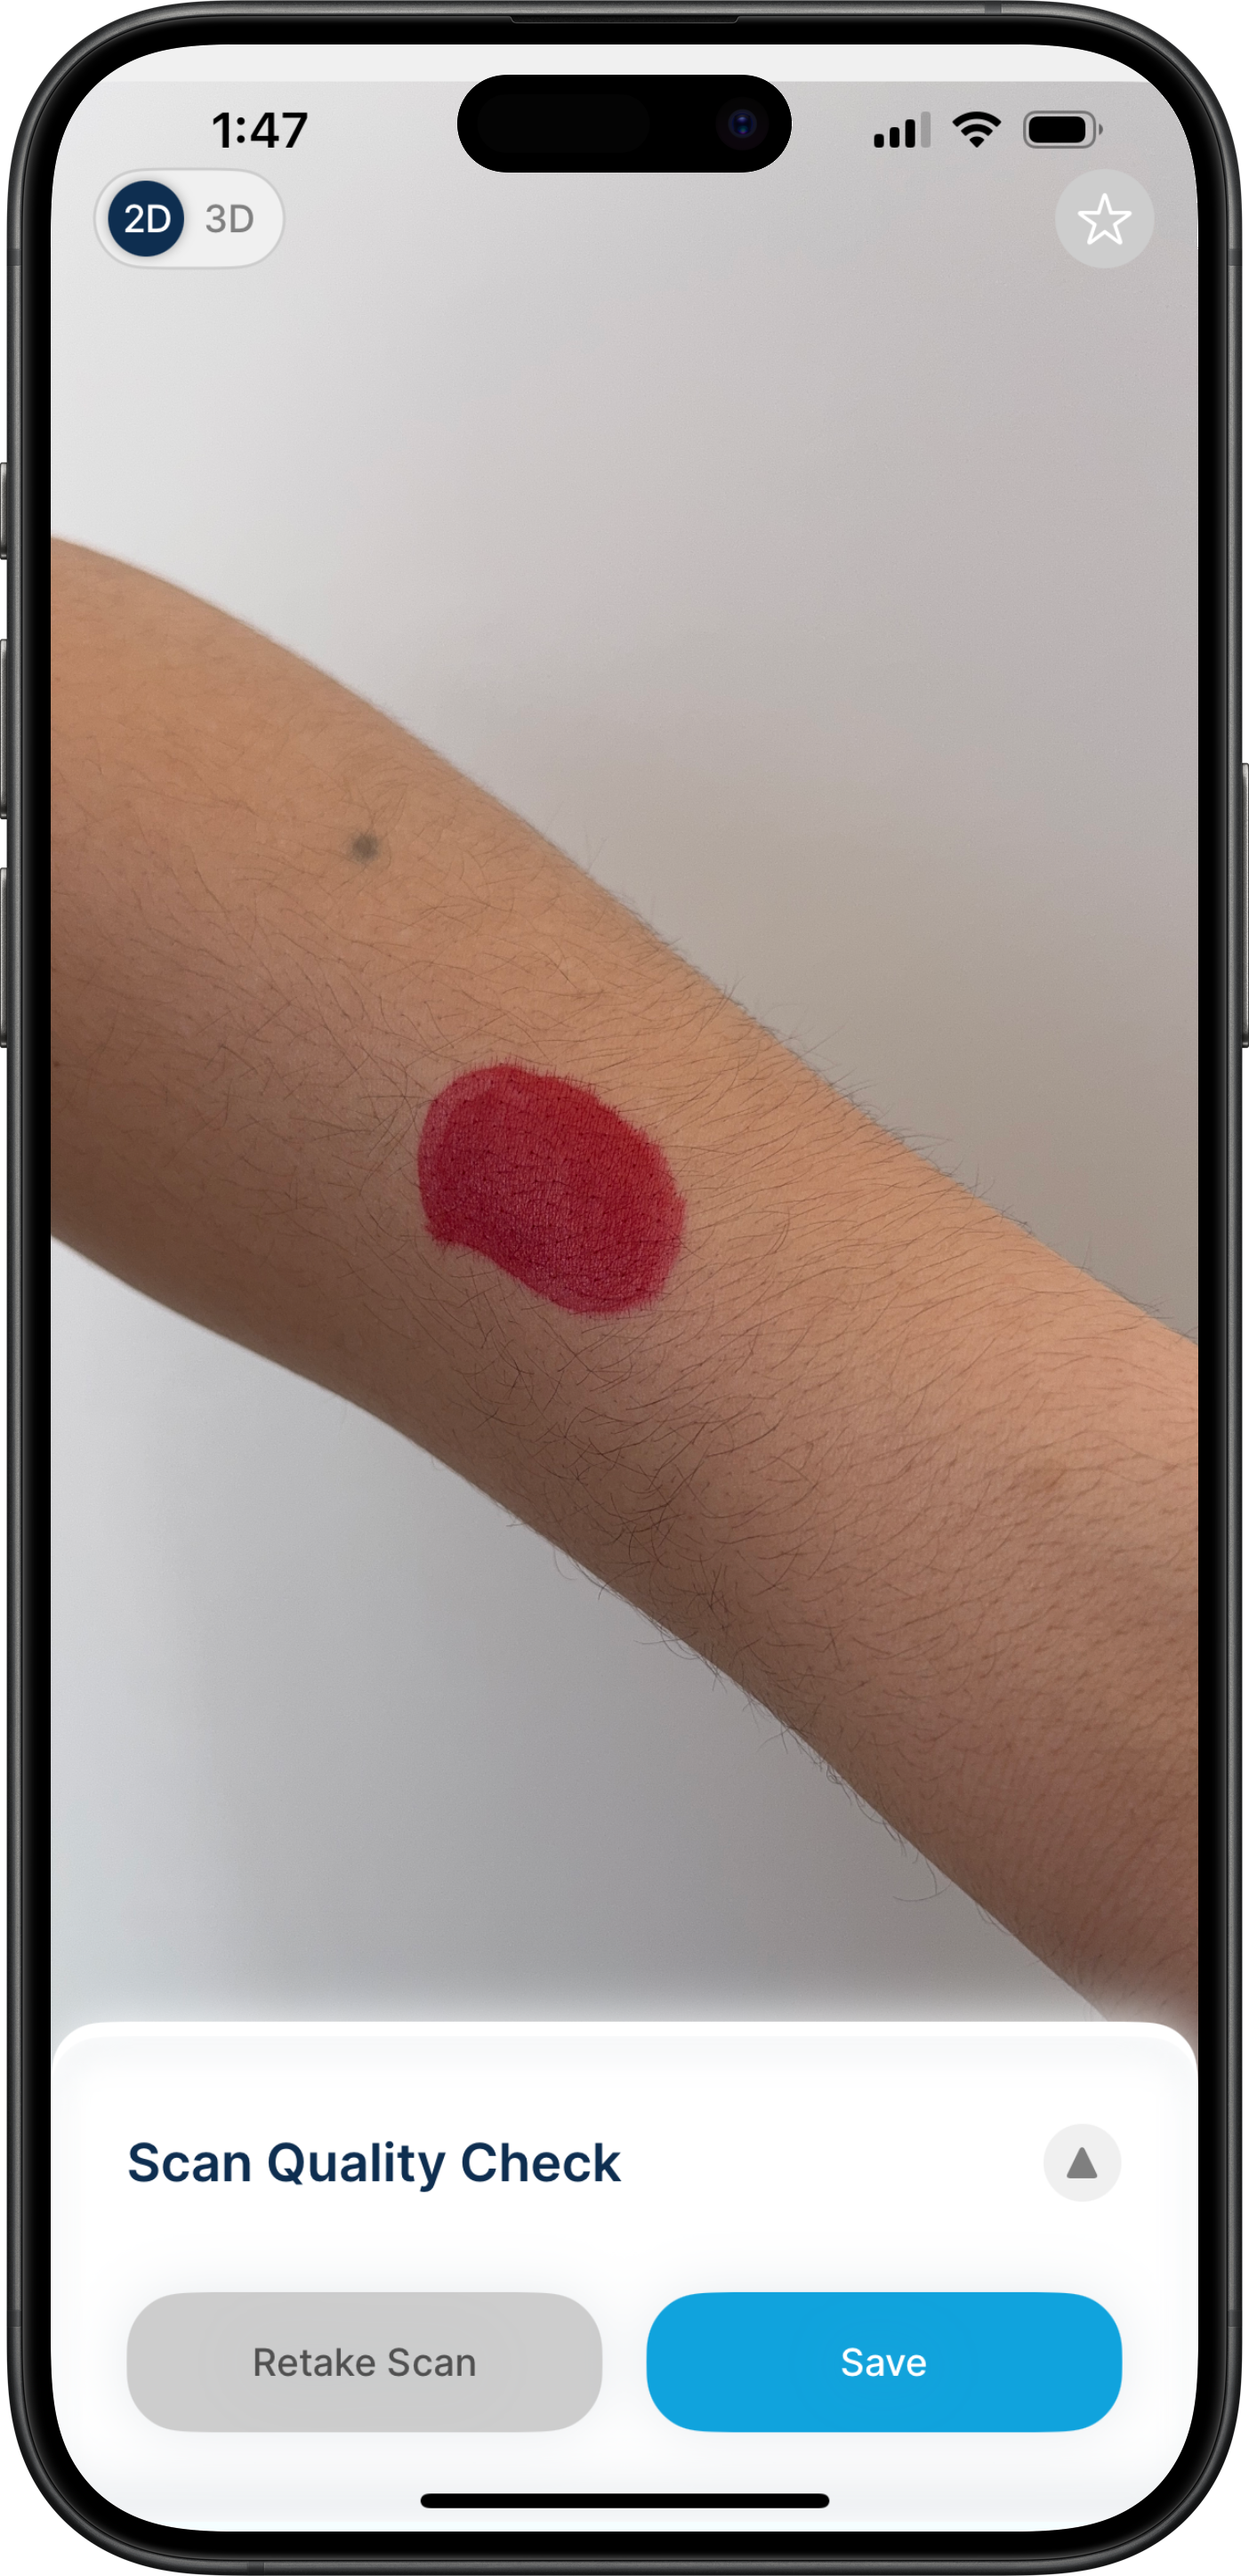
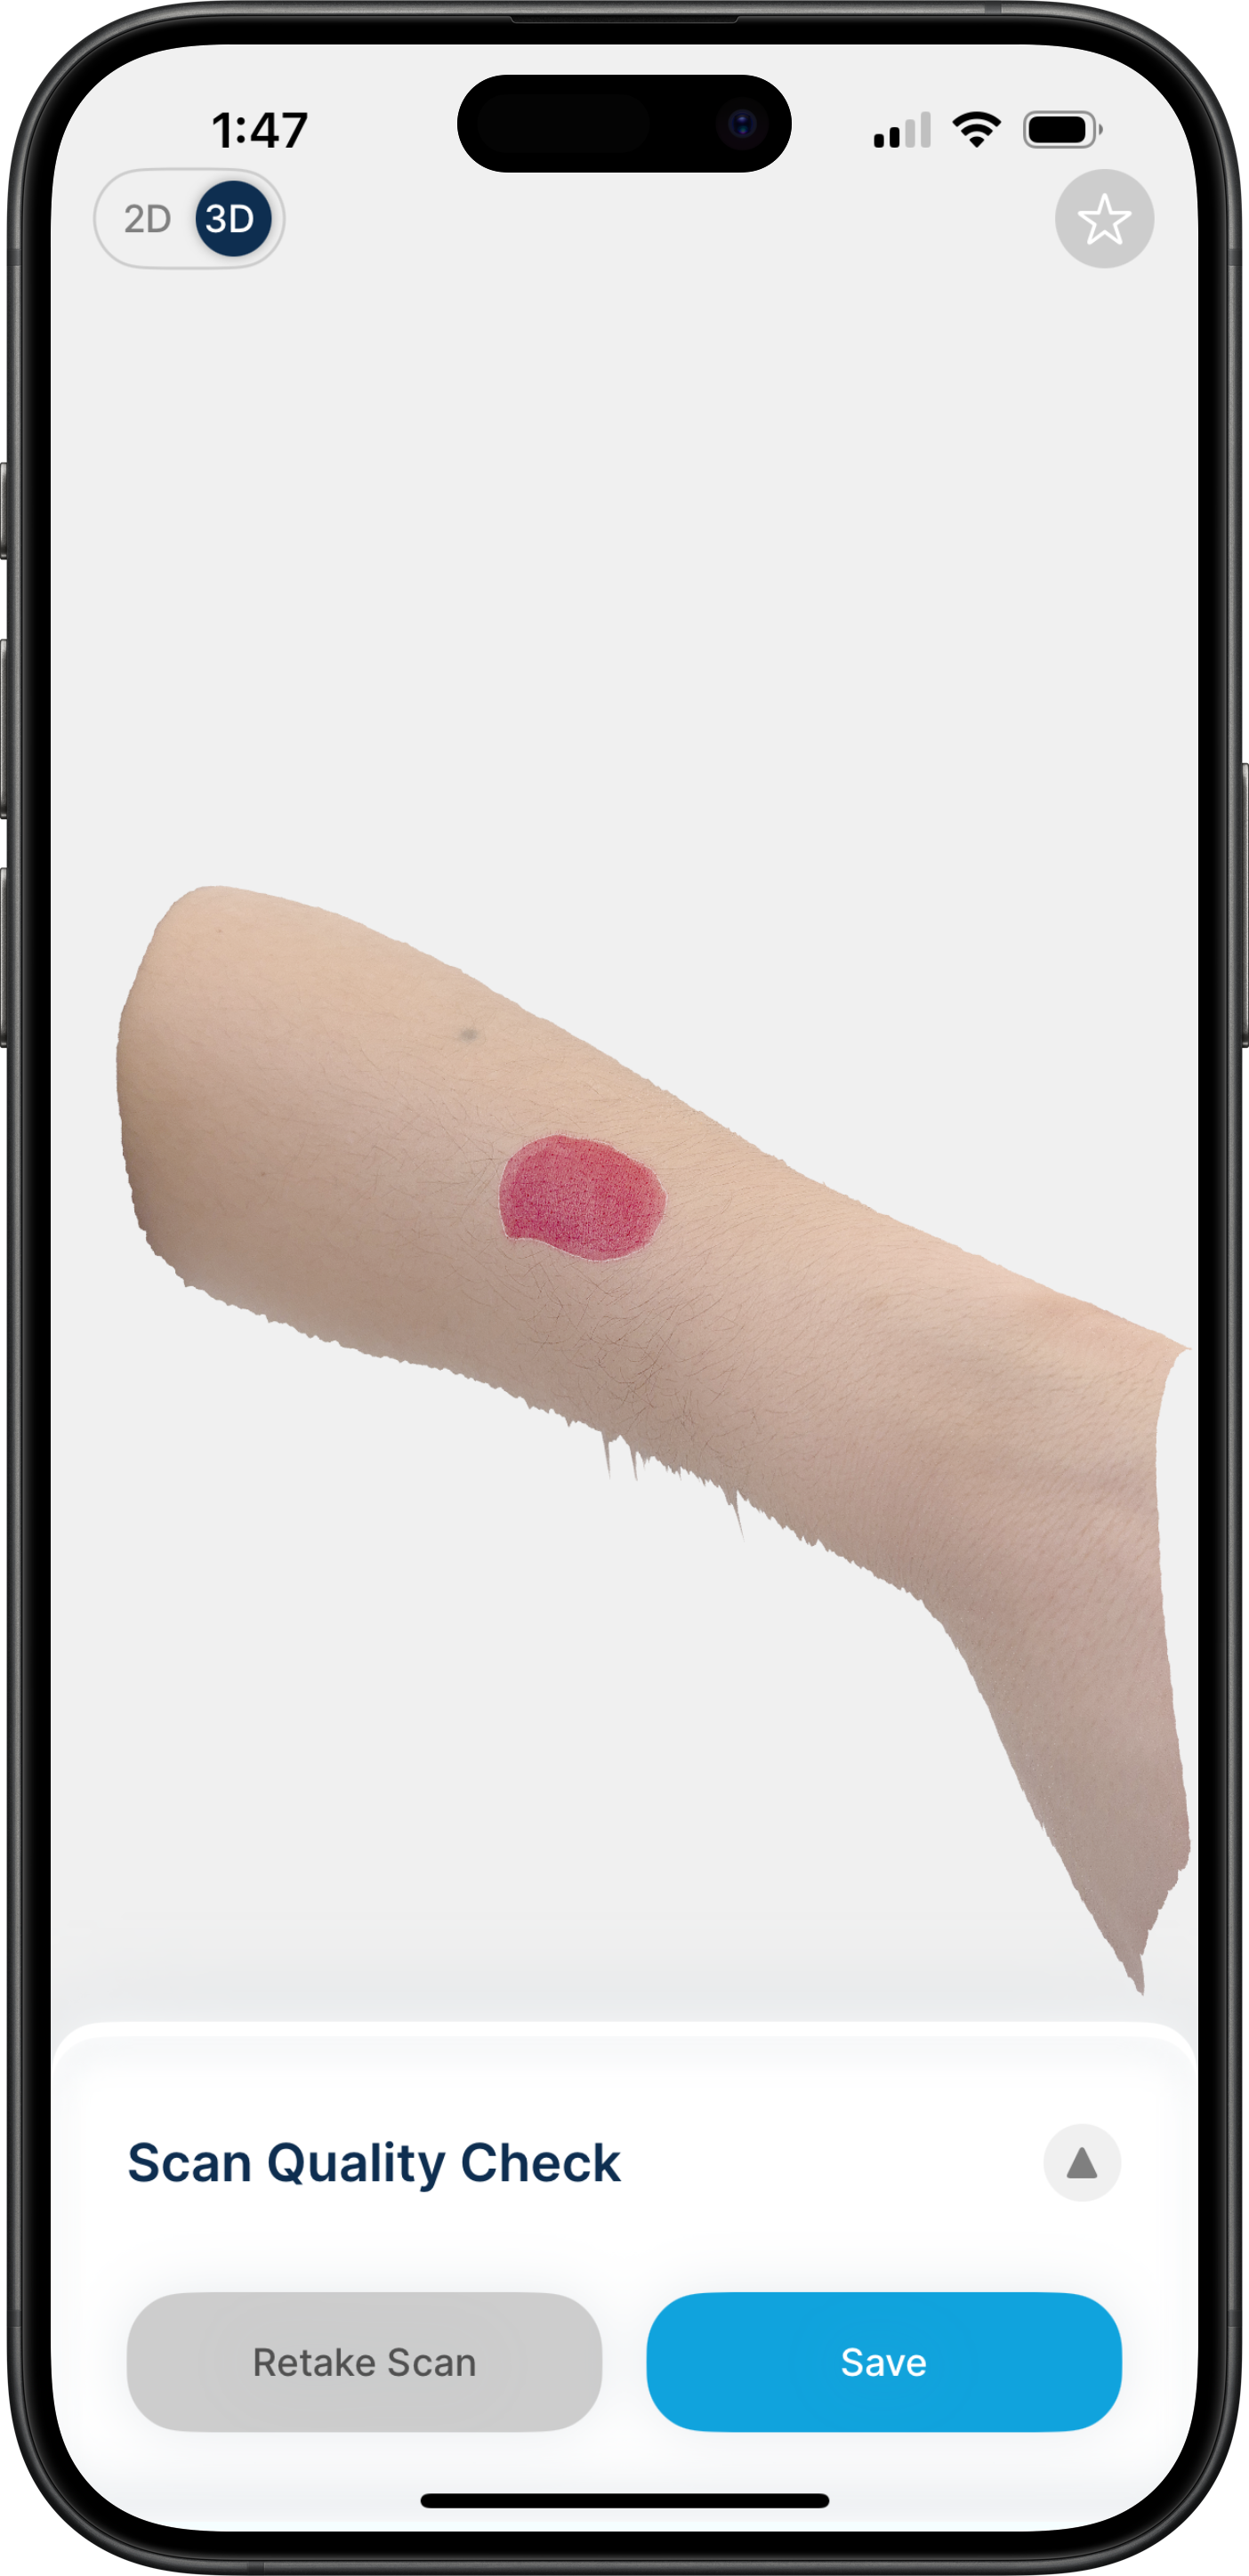
After selecting Next and confirming the mask, you will be presented with the scan quality checks and the generated 3D model.
Review these to ensure the scan was captured properly.
If you are happy with the scan, select Save to save the scan to the wound profile.
🚩Make Sure You Press Save: Scans that are not saved will be lost.
📋 What's Next?
With the scan captured and saved, you can proceed to:
❓ Need Help?
For further assistance, refer to the Wound³ support documentation or contact your Facility Administrator.